Table of Contents
DIY Macrame Tutorial: Colourful Vertical Double Half Hitch Knot Pattern
Material:
– 4mm Rope (Colors: Mustard, Terracotta, Vintage Blue)
Hello folks! I have an upward twofold half hitch tie design for you today. I love the delightful way simple it is to join tone into this example – I’ll tell you the best way to do this as we move along in the instructional exercise. In case you’re partaking in my instructional exercises it truly helps in the event that you could like and remark on this substance, Thanks to such an extent. How about we begin.
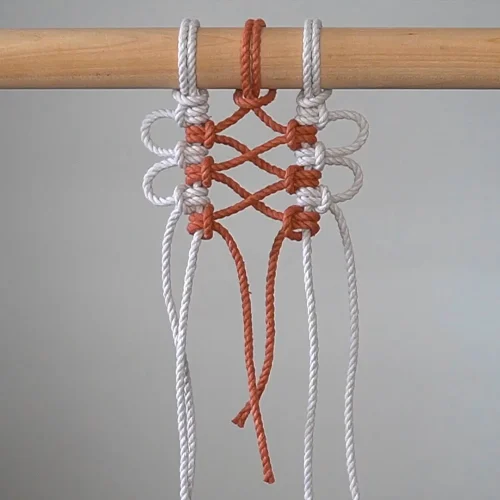
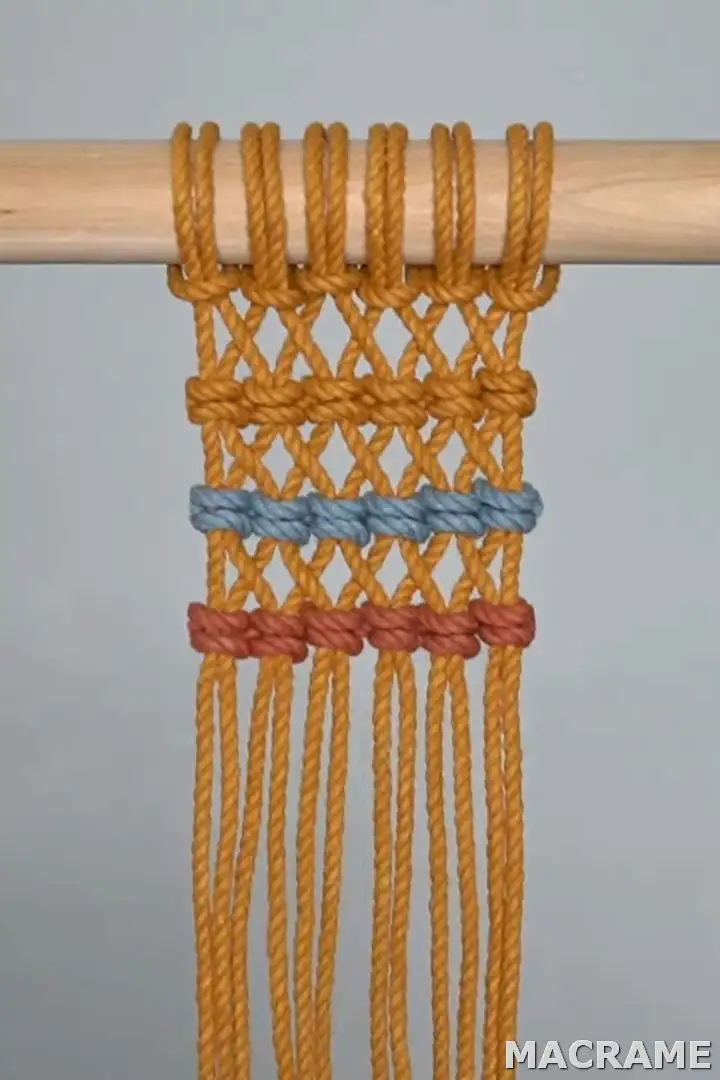
The completed plan measures 3.25 inches wide by 2.5 inches long however this is a simple example to rehash to make it more extensive or more.
A fast note on the length of the ropes utilized here: when tying the upward twofold half hitch tie, the ropes connected to your dowel are not used to tie your bunches (these are your filler lines). Extra ropes are added to your work that are utilized to tie your bunches (these are your functioning lines). Hence you will not have to add a lot to the length of your lines joined to your dowel. Cut 6 bits of mustard rope, each piece 60 cm long. Overlap each piece fifty-fifty and join to your dowel thinking carefully ties. Subsequent to making this plan there is around 10 cm left of rope under the last column of bunches.
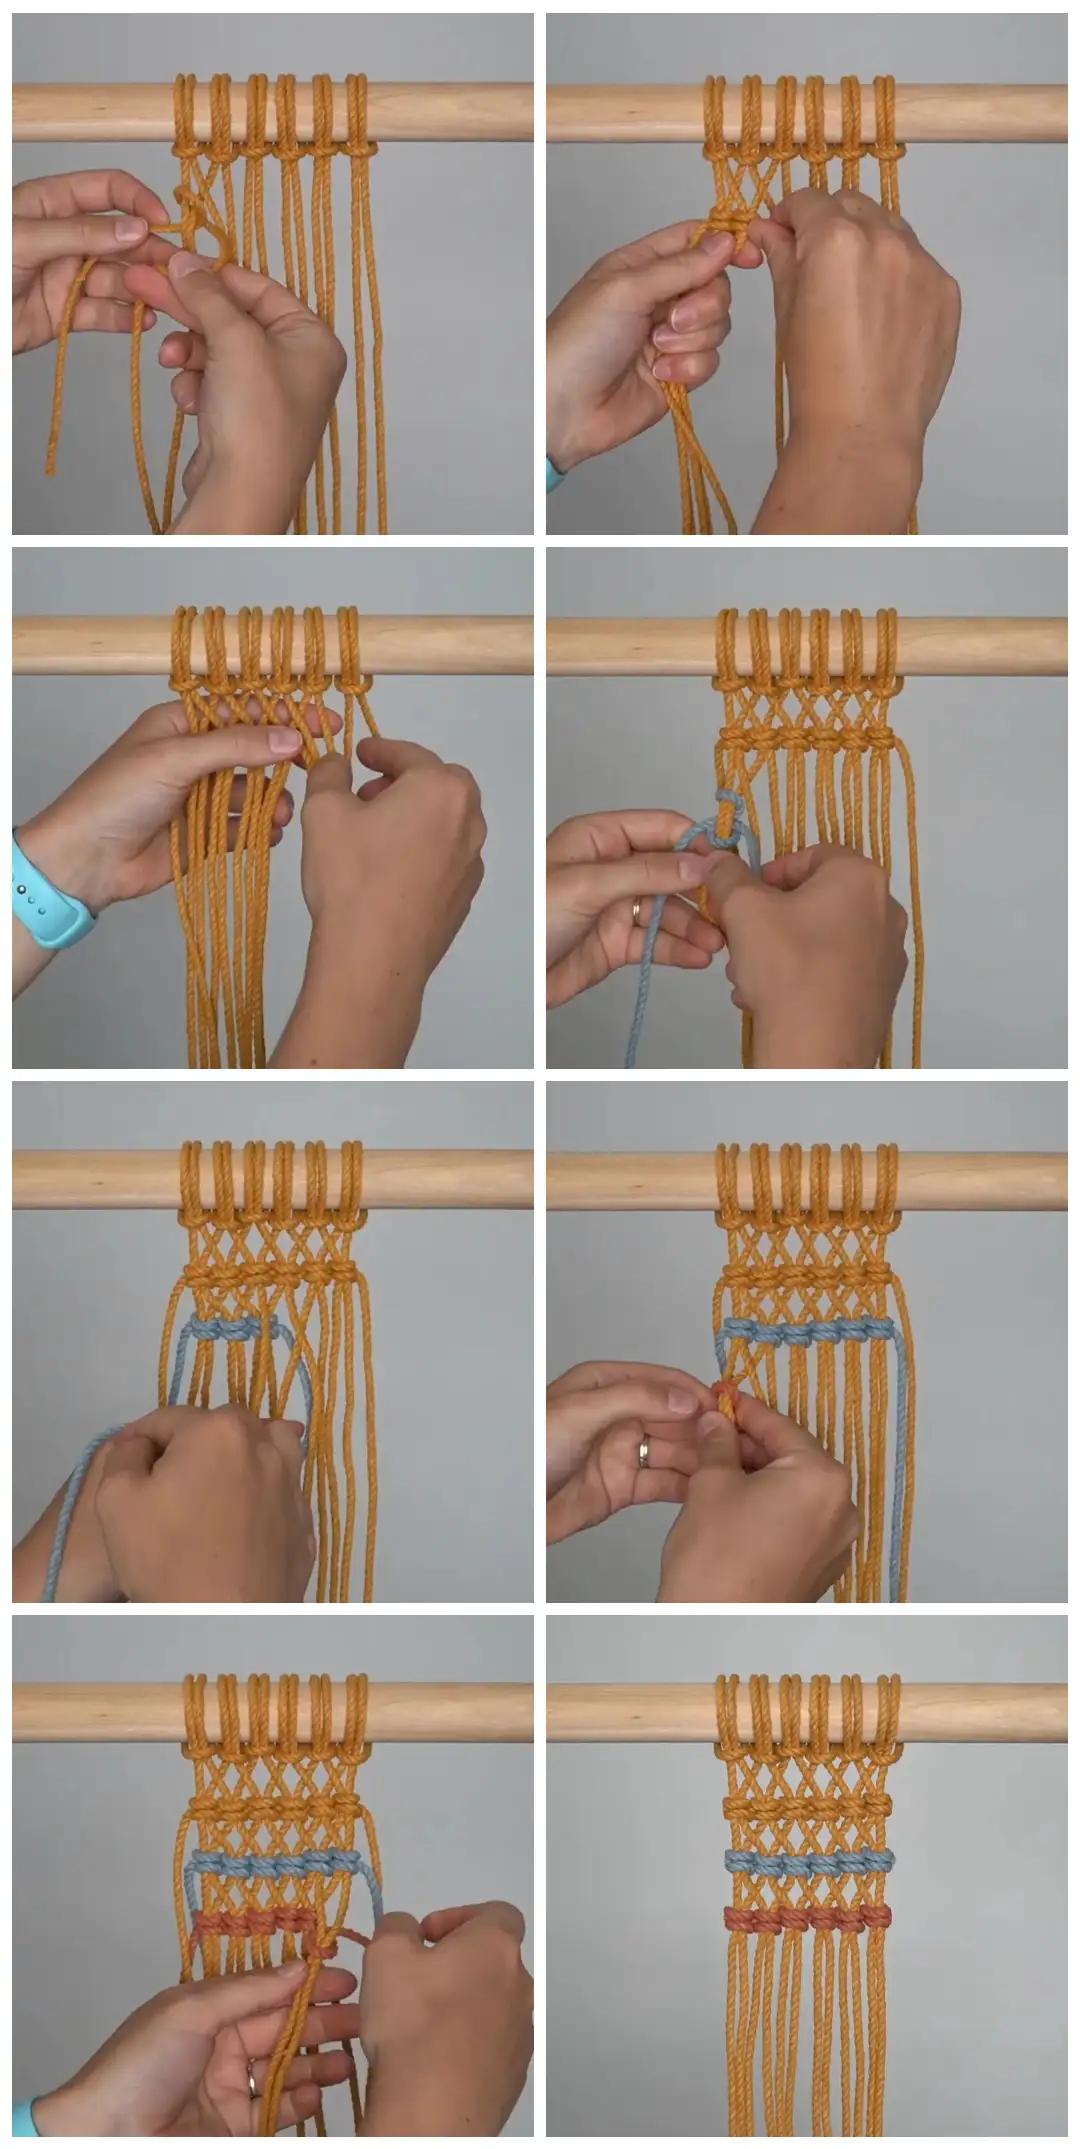
Cut one piece of mustard line, one piece of vintage blue string, and one piece of earthenware line, each piece is 3 ft long. Snatch your piece of mustard string and tie 6 vertical twofold half hitch ties along your work. Prior to tying each bunch cross the filler lines as I’ve done here.
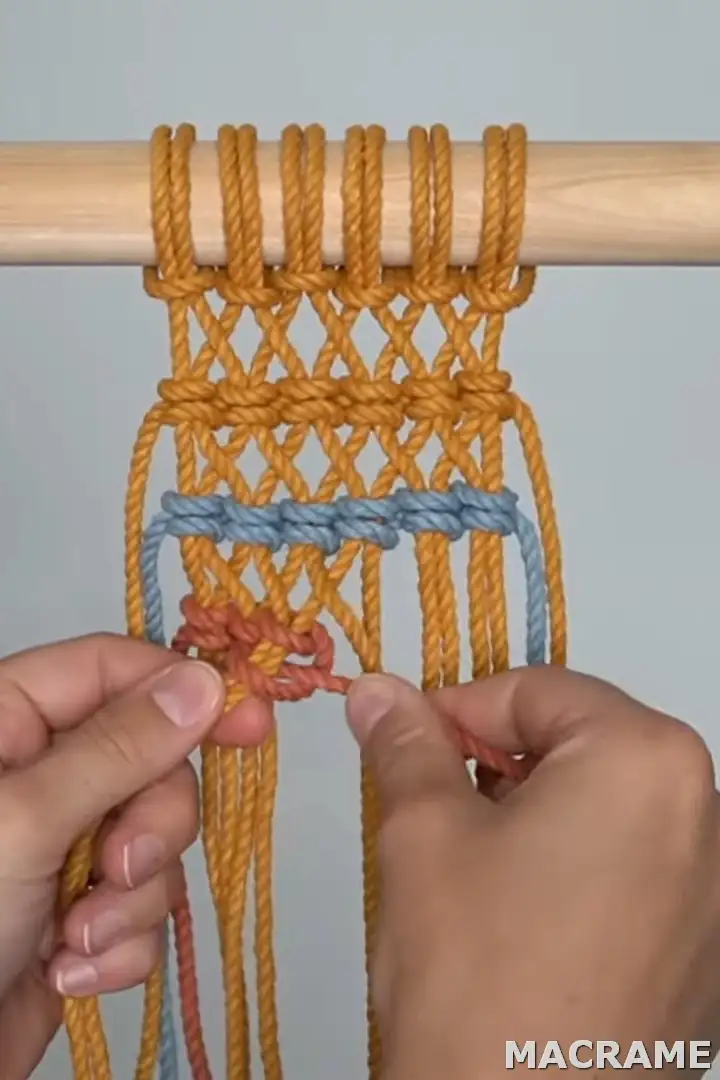
Rehash this interaction adding the piece of vintage blue rope to your work. Leave around a 1/2 inch of room between the columns of bunches. Rehash this interaction adding the piece of earthenware rope to your work.
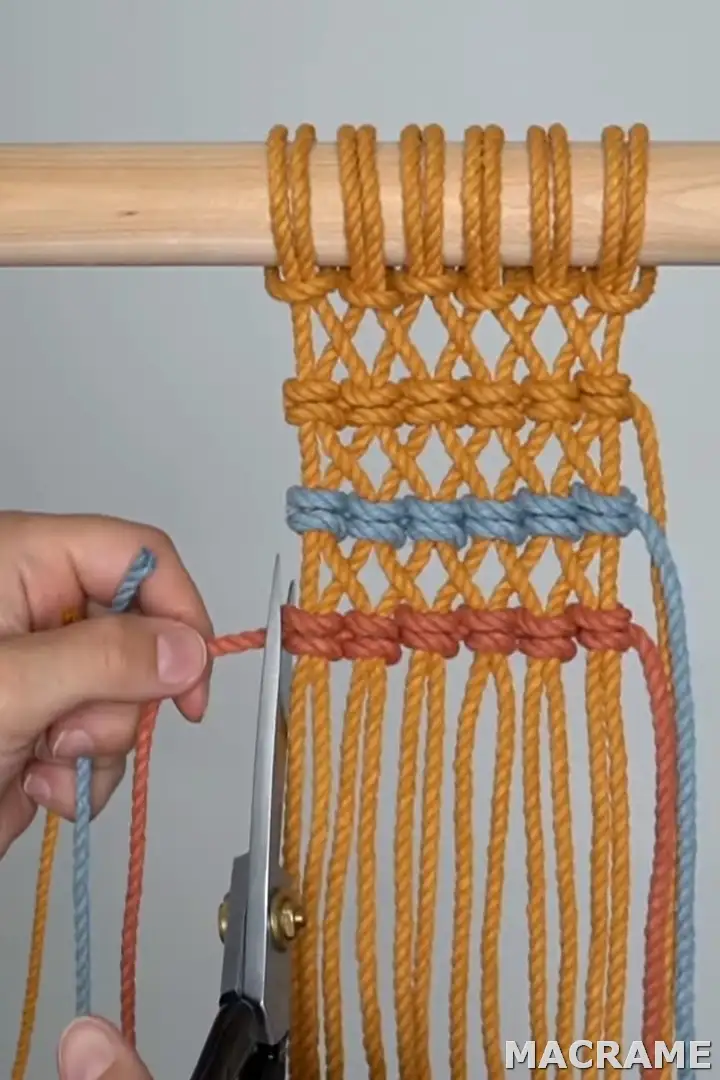
Get the closures into the rear of your work or cut them off. In case you’re stressed over the bunches coming fixed you can generally add a bit of paste where you’ve sliced the additional line to get the bunch set up.
I love the vibe of this example and will try different things with it to make a couple of other venture so stay tuned for those instructional exercises in the coming months. A debt of gratitude is in order for watching!
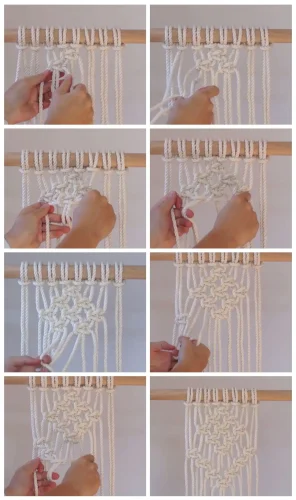
How To Make The Easiest Macrame Diamond Pattern?
First of all, we cut our macrame threads, which are 3 mm thick, as 3 pieces, 1 meter each. Then fold a macrame thread in half and pass it through the key chain attachment. Put the ends of the two ropes together through the tiny slot formed, and then fix them. You have to repeat the same process for all three ropes. The trick you need to pay attention to here is that all the ropes are of equal length. In order to work more comfortably, we fix our key apparatus by taping it somewhere. There should be a total of 6 threads. 3. We take the rope and fix it. Then we make a tight knot by passing the 2nd Rope over the 3rd Rope. While fixing, push with the help of your fingernail. So you will have a stronger knot. Reinforce the knot by repeating the same process for the 2nd time. The Macrame Diamond Pattern will gradually begin to form. Then do the same by passing the 1st thread over the 3rd thread. Without tightening it completely, push it under the middle of the 2 knots. Take the 4th thread on the other side and pass it over the 5th thread. Then tie the 6th thread over the 5th thread and tie a knot. Separate the rightmost strands into corners. Then you will have 4 ropes in the middle. Extend the rightmost of these 4 ropes to the leftmost rope in the form of the letter c. And form a knot by passing the right rope through the letter C you created. By repeating these processes, you can get a lozenge macrame pattern or diamond macrame pattern.