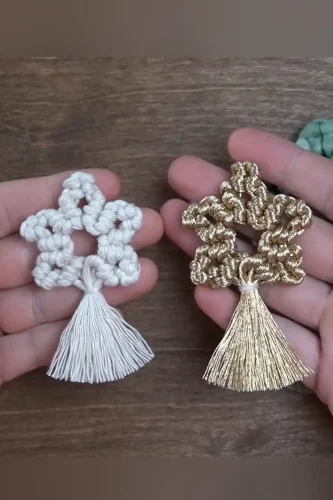
Do-It-Yourself Macrame: Macrame Feather/Leaf. Kindly see beneath for materials and composed guidelines.
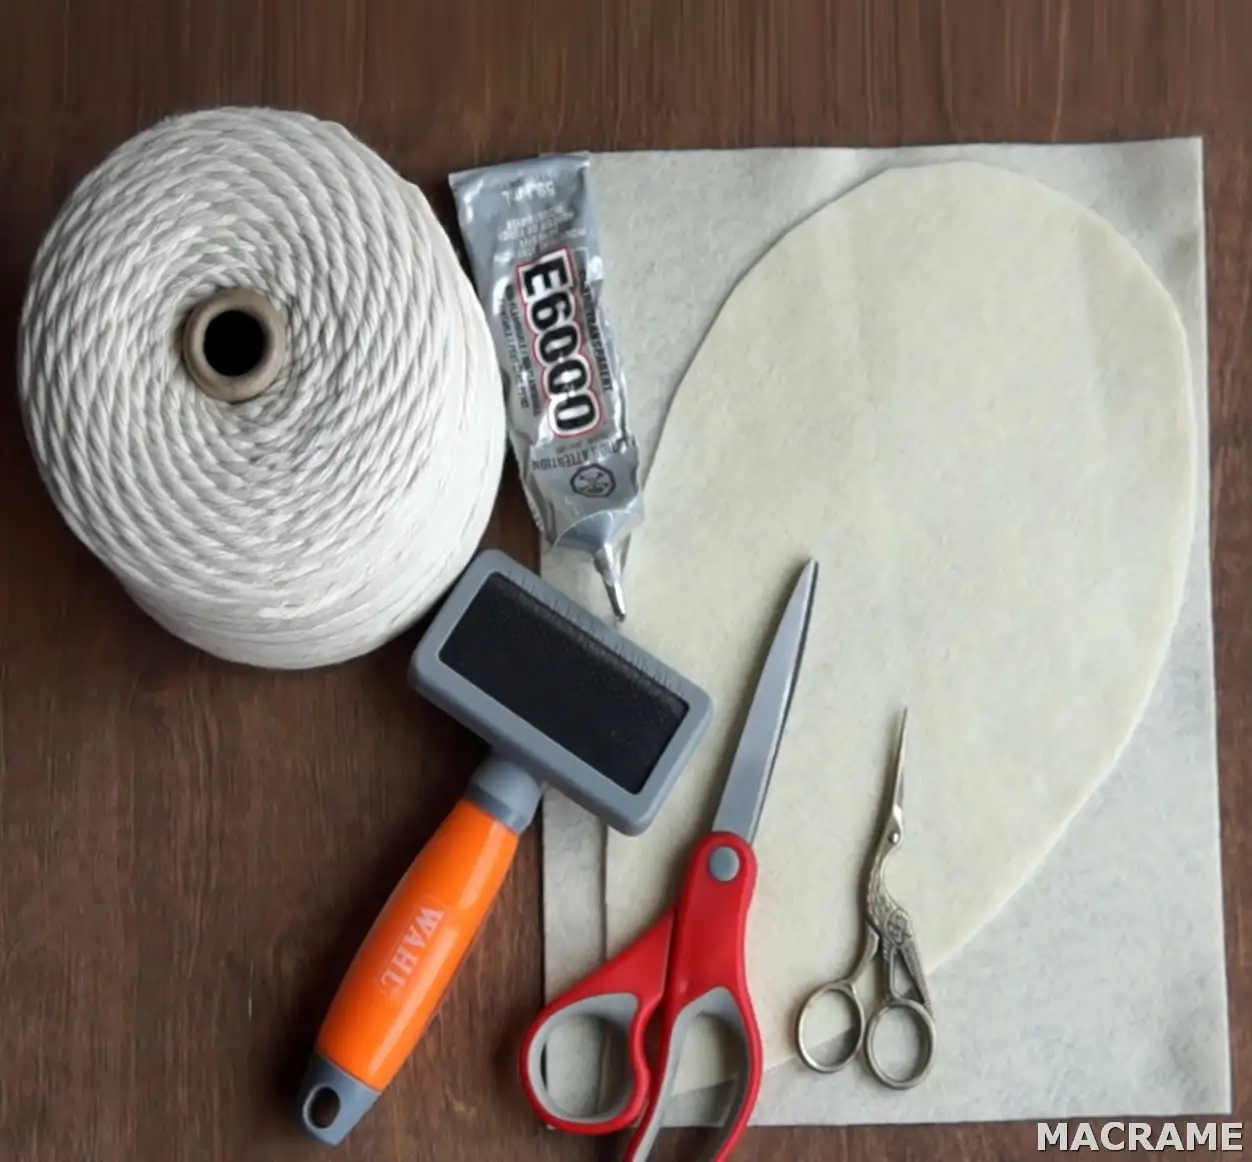
Materials :
– Pet Brush and Comb
– 3mm Single Strand Twisted Cotton String
– Felt
– Fabric Glue
– 2mm and 3mm Twisted Cotton String
– Scissors
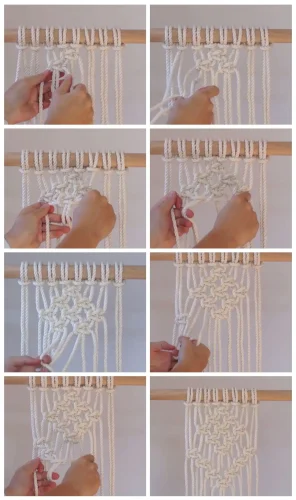
*Please note: I use Cow Hitch bunches to make the quill/leaf. This bunch is the converse of the Lark’s Head tie (if you somehow managed to flip the Lark’s Head tie around you would see the Cow Hitch Knot).
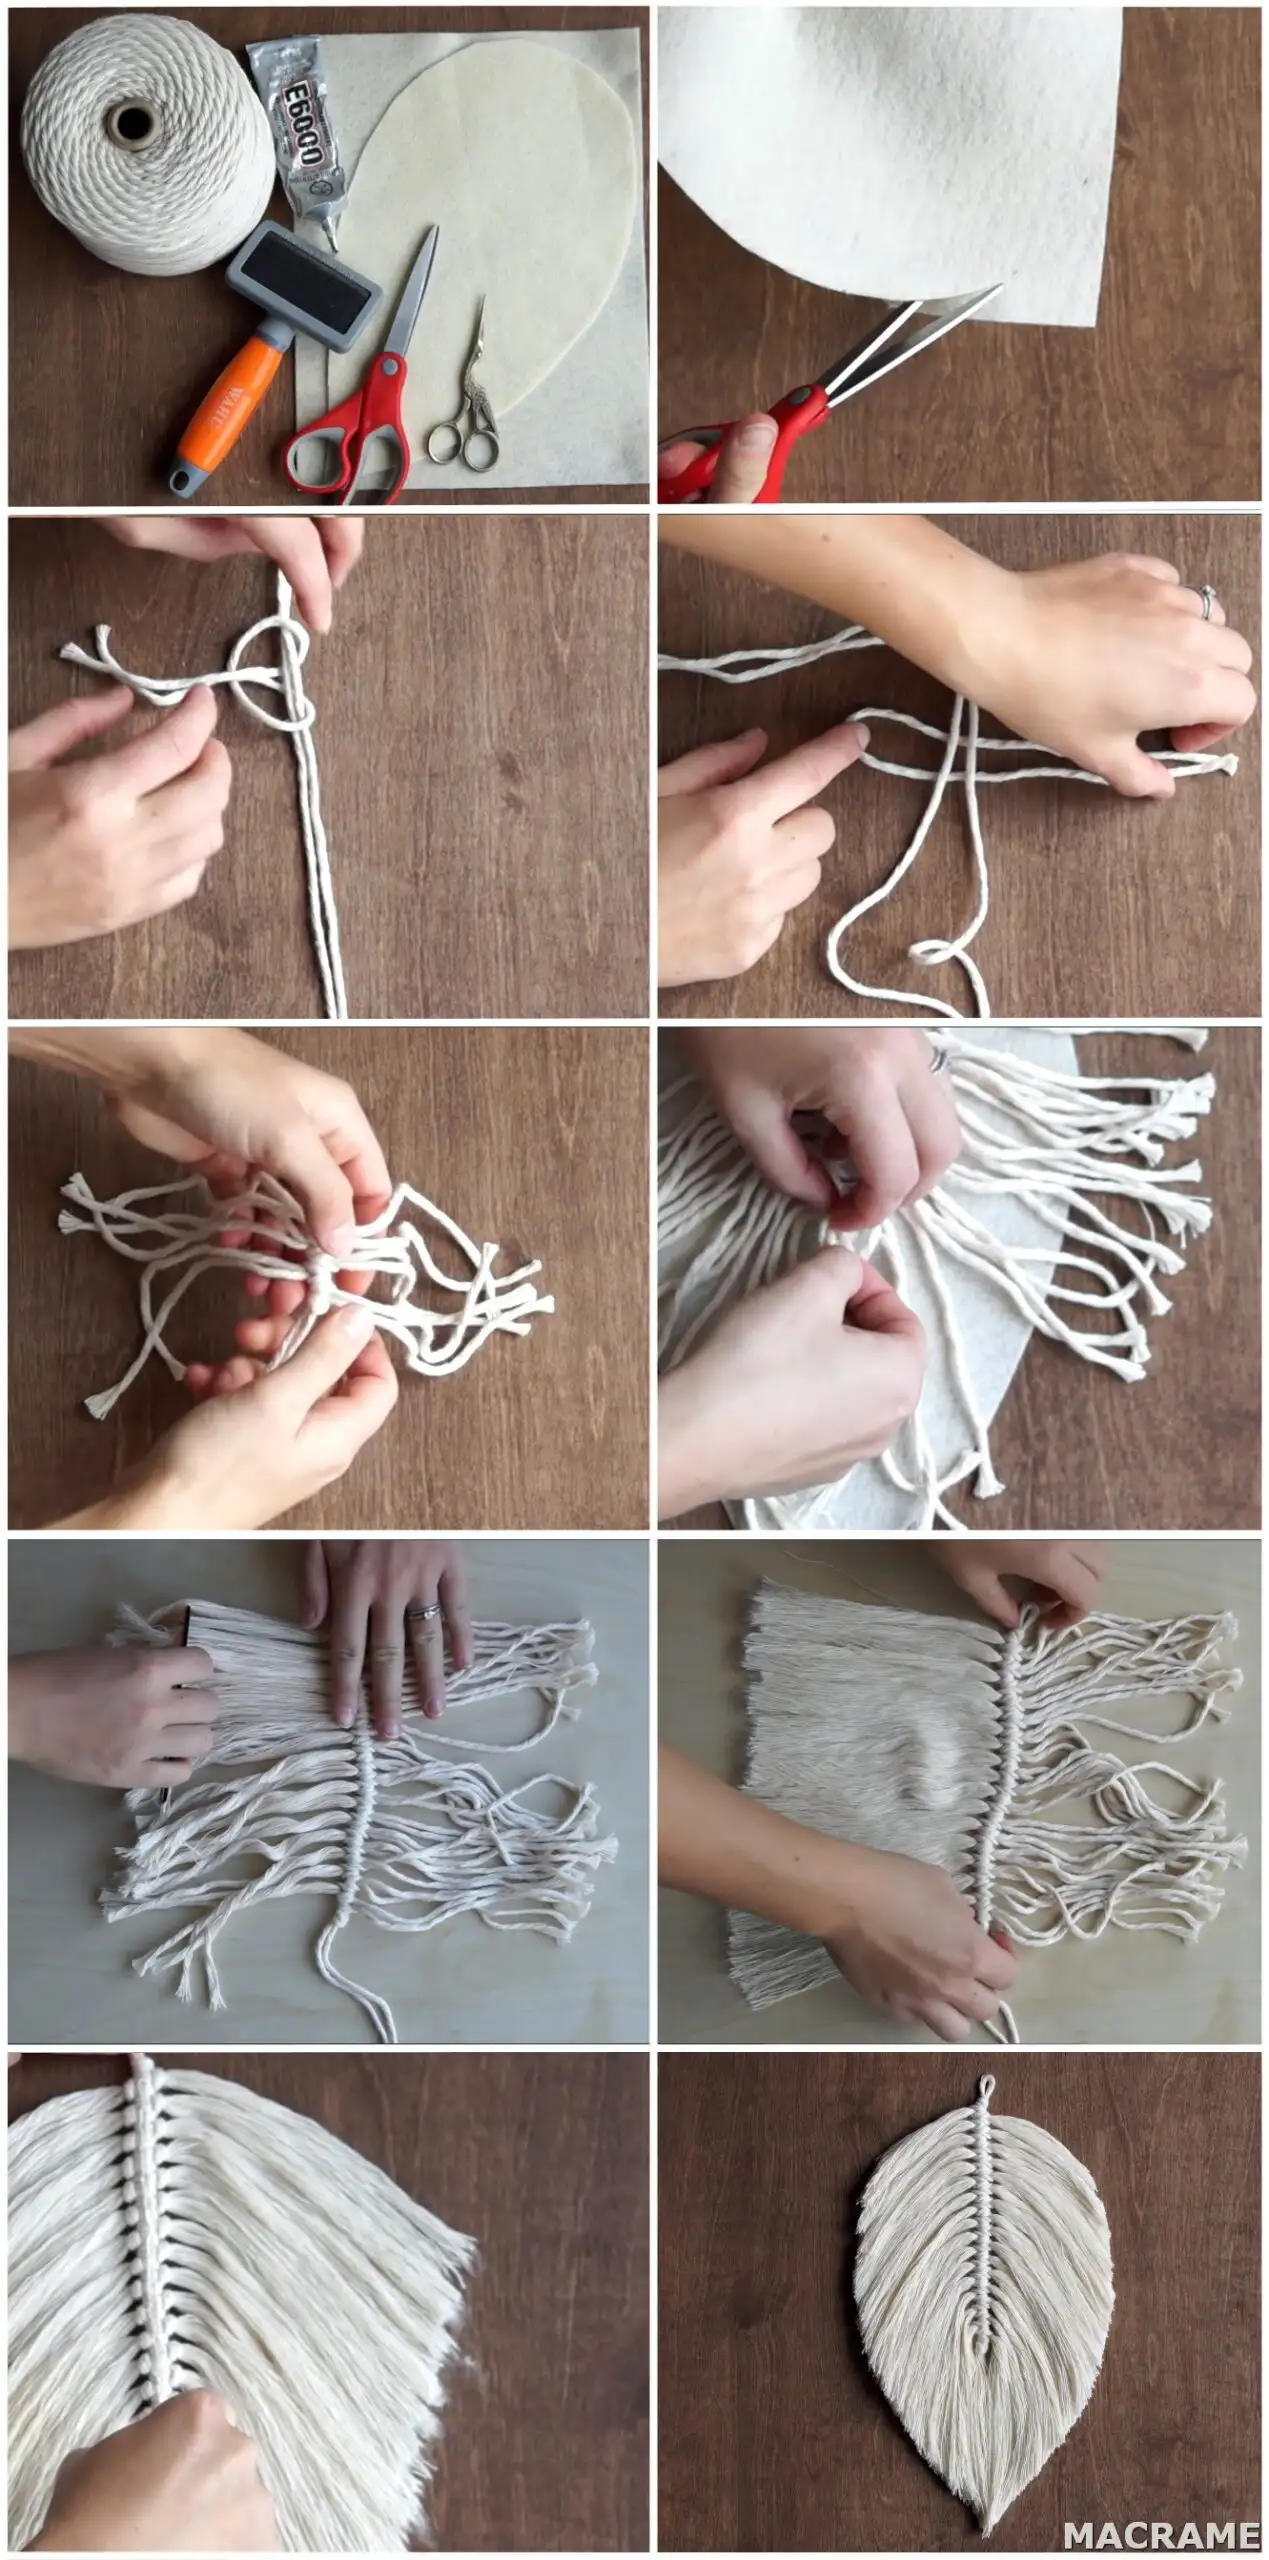
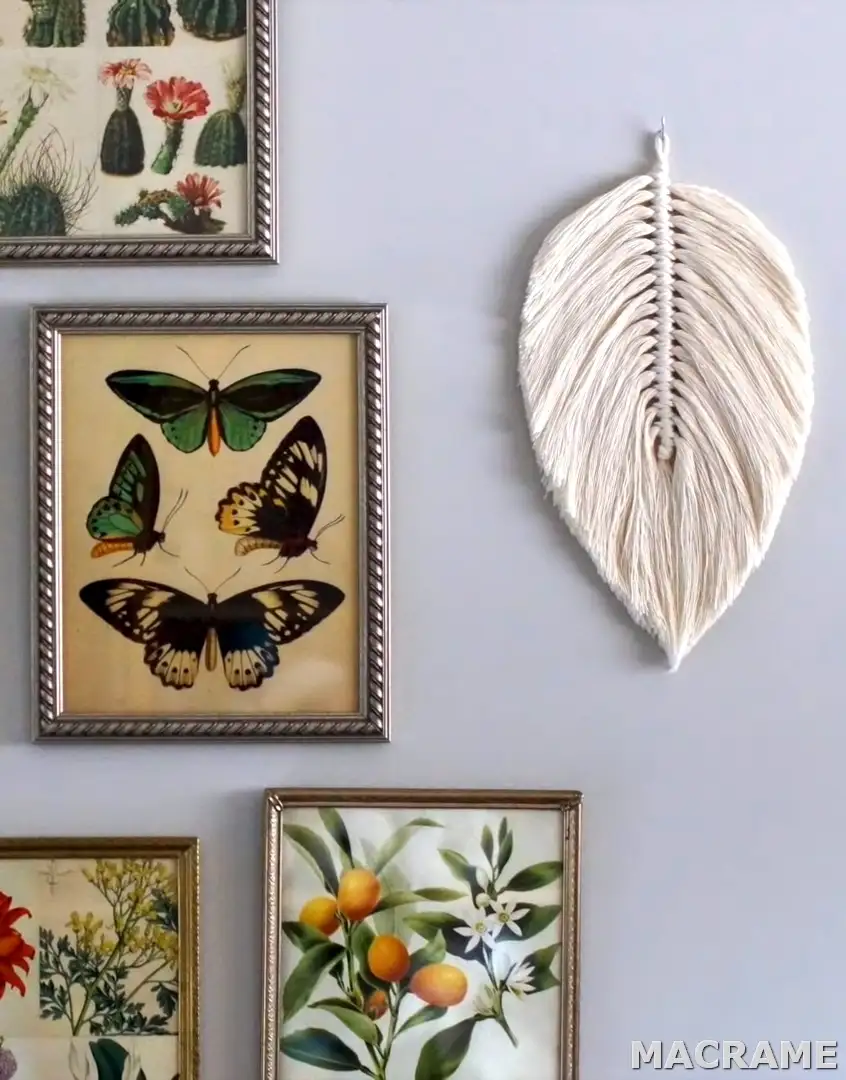
We will begin by cutting the felt. The felt will be utilized as a sponsorship for your plume. It hold’s the plume’s shape when you drape it on the divider. Slice your felt to your ideal size. In the event that you are keen on making a few plumes I would suggest cutting yourself a layout that can be utilized to apportion your felt.
My layout is 13 inches (33 cm) long and 7 1/4 inches (19 cm) wide at its vastest point. This makes a completed plume that is 15 inches (38 cm) long and 8 inches (21 cm) wide.
Next we will slice the wound string to make the quill. Cut a piece of string that is a day and a half (92 cm) long. This piece of rope will run along the focal point of your quill. Overlay it down the middle and tie a twofold bunch at the top.
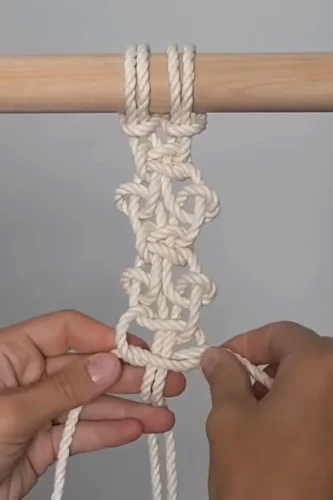
Cut 32 bits of rope – each piece is 17 inches (43 cm) long. Connect these bits of rope to your focal point utilizing Cow Hitch ties. A Cow Hitch tie is the opposite of the Lark’s Head Knot. If you somehow happened to make a Lark’s Head bunch and afterward flip your work over you would see a Cow Hitch tie.
Connect one piece on the left, one piece on the right, etc. Rehash this interaction until you connected every one of the 32 bits of rope.
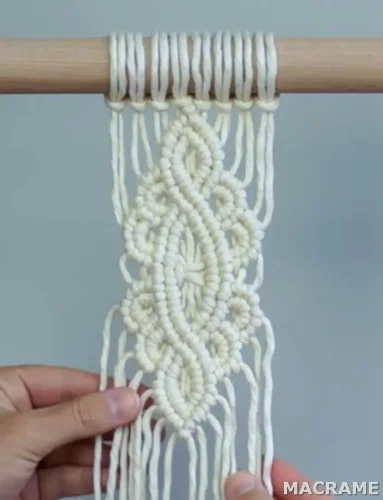
Here is what it will resemble up and over of the felt. I like to leave an inch or so of string on each side so you can’t see the felt from the front.
With the two center strands tie a twofold bunch at the lower part of your work.
Eliminate the felt from the back and brush out your string. I will change to another board behind my work so I don’t scratch up this board when I brush out my string.
Utilizing your pet brush, brush out your string.
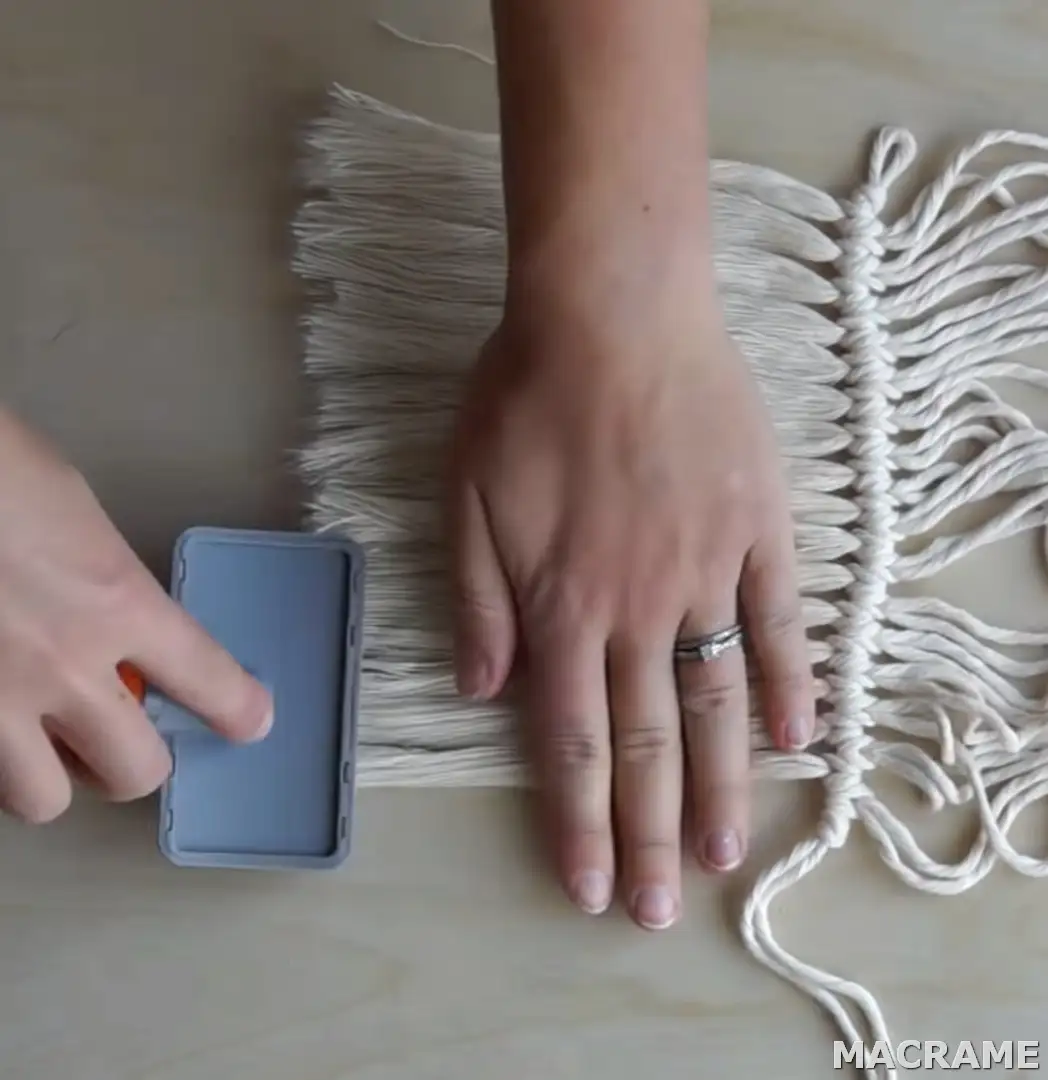
I like to return over the string with a fine brush subsequently to ensure the string is totally brushed out and doesn’t twist.
You may track down some additional cotton on your brush – that is typical simply dispose of it before you begin brushing once more.
Flip your work around and brush out the opposite side.
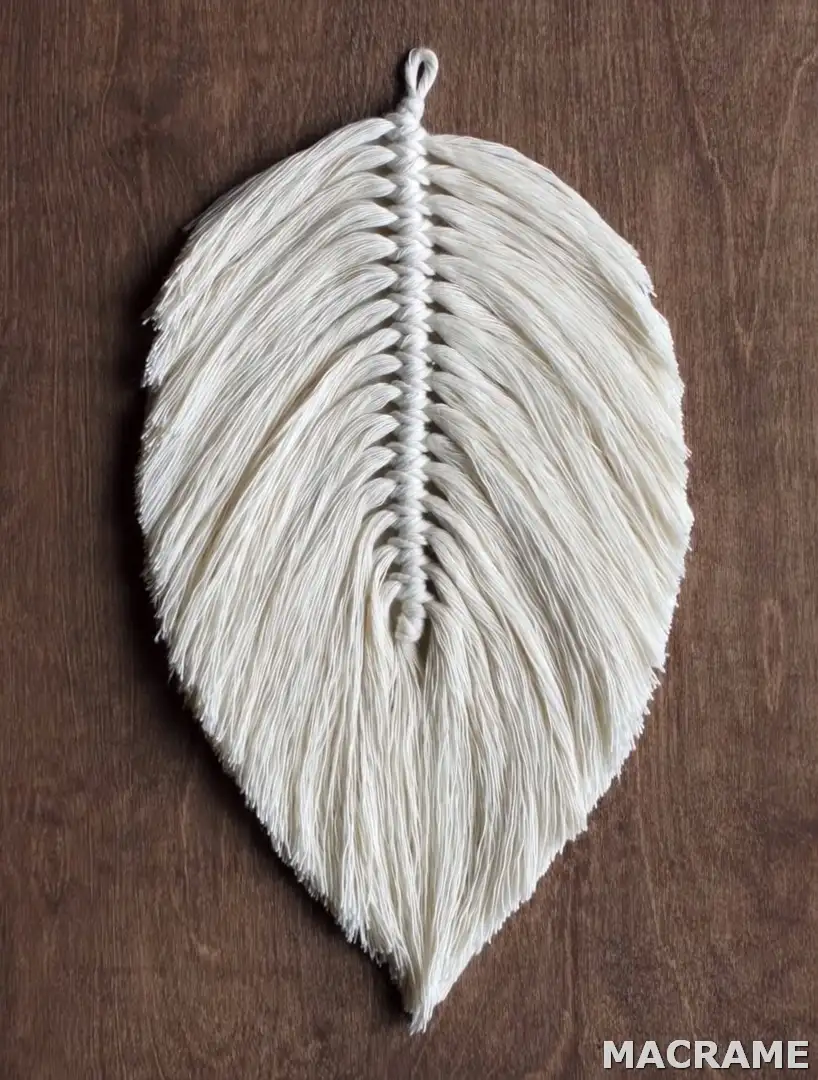
Choose which side of the plume you need to be the front of your work. We will add felt to the opposite side of your work. I will utilize this side as the front of my work.
Snatch your paste and add paste to the highlight of your plume. Add paste to your felt also.
Flip your work over and add some additional paste to the top.
Flip your work back finished and cut at the edges of your work. Follow your felt format.
My normal scissors are somewhat dull so I utilized my sewing scissors. I would suggest a sharp pair of normal scissors yet sewing scissors will function too.
Cut the opposite side and afterward flip over for definite decorations.
Brush the front strands to ensure it is all straight and afterward cut where fundamental.
I like to cushion my quill up a smidgen to give it somewhat more profundity.
MACRAME – The Easiest Way to Create Your Own Handmade
The major technique used in crafting these masterpieces is macrame. This method of weaving yarn around a wooden frame has been around for hundreds of years. Craftsmen of old quickly learned the art of making and repairing these intricate pieces by practicing on scrap materials. Today, the craft continues to grow in popularity, as craftsmen learn new techniques and experiment with new colors, resulting in new patterns.
Many people enjoy handcrafted pieces as a hobby. They are also lovely gifts for loved ones on special occasions. For instance, I recently gave my sister one of my favorite homemade pieces–a gorgeous macrame floral centerpiece for her big party. My sister was delighted when she saw it! The wonderful thing about handmade crafts is that the skill can be honed and improved over time. It takes patience, practice, and determination, but the results are well worth the effort.
Learning how to macrame isn’t difficult. In fact, I’m surprised at how many people don’t know how to make them. I started by reading through all of the material available on the internet. I found a great website with a large collection of videos, including a video for beginners, a video on how to read the diagrams, an instructional video on how to construct a macrame rack, and many other short videos.
After I collected all of the information I needed, I started to make my first macrame pattern. I chose a macrame pattern that involved half hitch knots, so I was able to start the project without having to purchase additional supplies. I didn’t know how to read the pattern at the time but after watching the video I understood most of the basic steps. After I completed the project, I was able to successfully complete the same project without ever needing to purchase another pattern book or any other tool.