Table of Contents
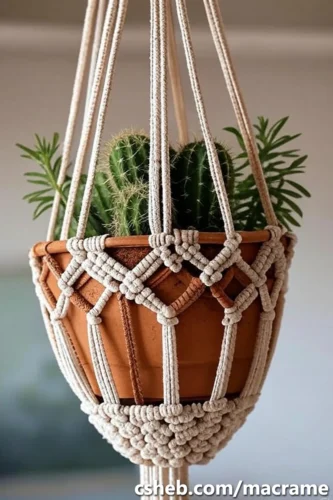
DIY Macrame Tutorial- Echinacea Flower
What is Macrame?
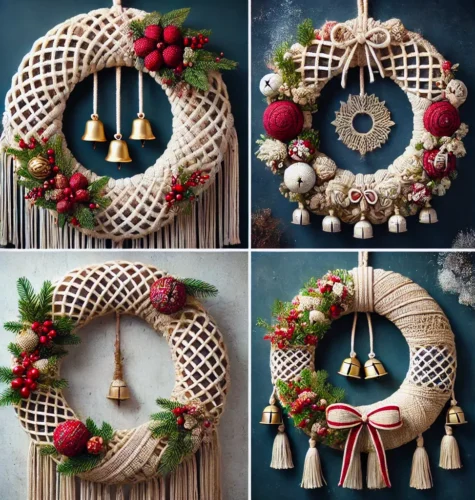
Macrame, which is used in many areas from wall ornaments to keychains, from keychains to earrings, from earrings to door ornaments and even to phone hangers, is a kind of decoration technique made with different knots and knitting techniques with various threads. The most popular macrame pattern of macrame, which has many popular patterns, is the diamond pattern macrame.
What are the Materials Required for Making Diamond Pattern Macrame?
When making macrame, the materials vary according to the pattern you will make and the purpose of the product you will make. However, the necessary materials for making diamond pattern macrame are: tape, key chain attachments (optional), macrame string, scissors and comb.
How To Make The Easiest Macrame Diamond Pattern?
DIY Macrame Tutorial: Echinacea Flower Using Rope and Ribbons!
Please see below for materials and written instructions.
Material:
– 4mm Triple Strand (3 Ply) Rope (Colour: Ivory)
– Cotton Frizz Ribbons (Colours: Caramel and Mocha)
– Sari Silk Ribbons (Colours: Magenta and Soft Green)
Hello folks! I’m eager to share this echinacea bloom plan with you today. You can utilize the example without strips or strips can be utilized to fill it in and add a little tone and surface which I’ll tell you the best way to do toward the finish of this video. The completed plan estimates 6 inches wide by 7 inches in length. In case you’re making the most of my instructional exercises it would truly take care of me on the off chance that you could hit approval underneath and buy in to my channel. Much thanks to you!
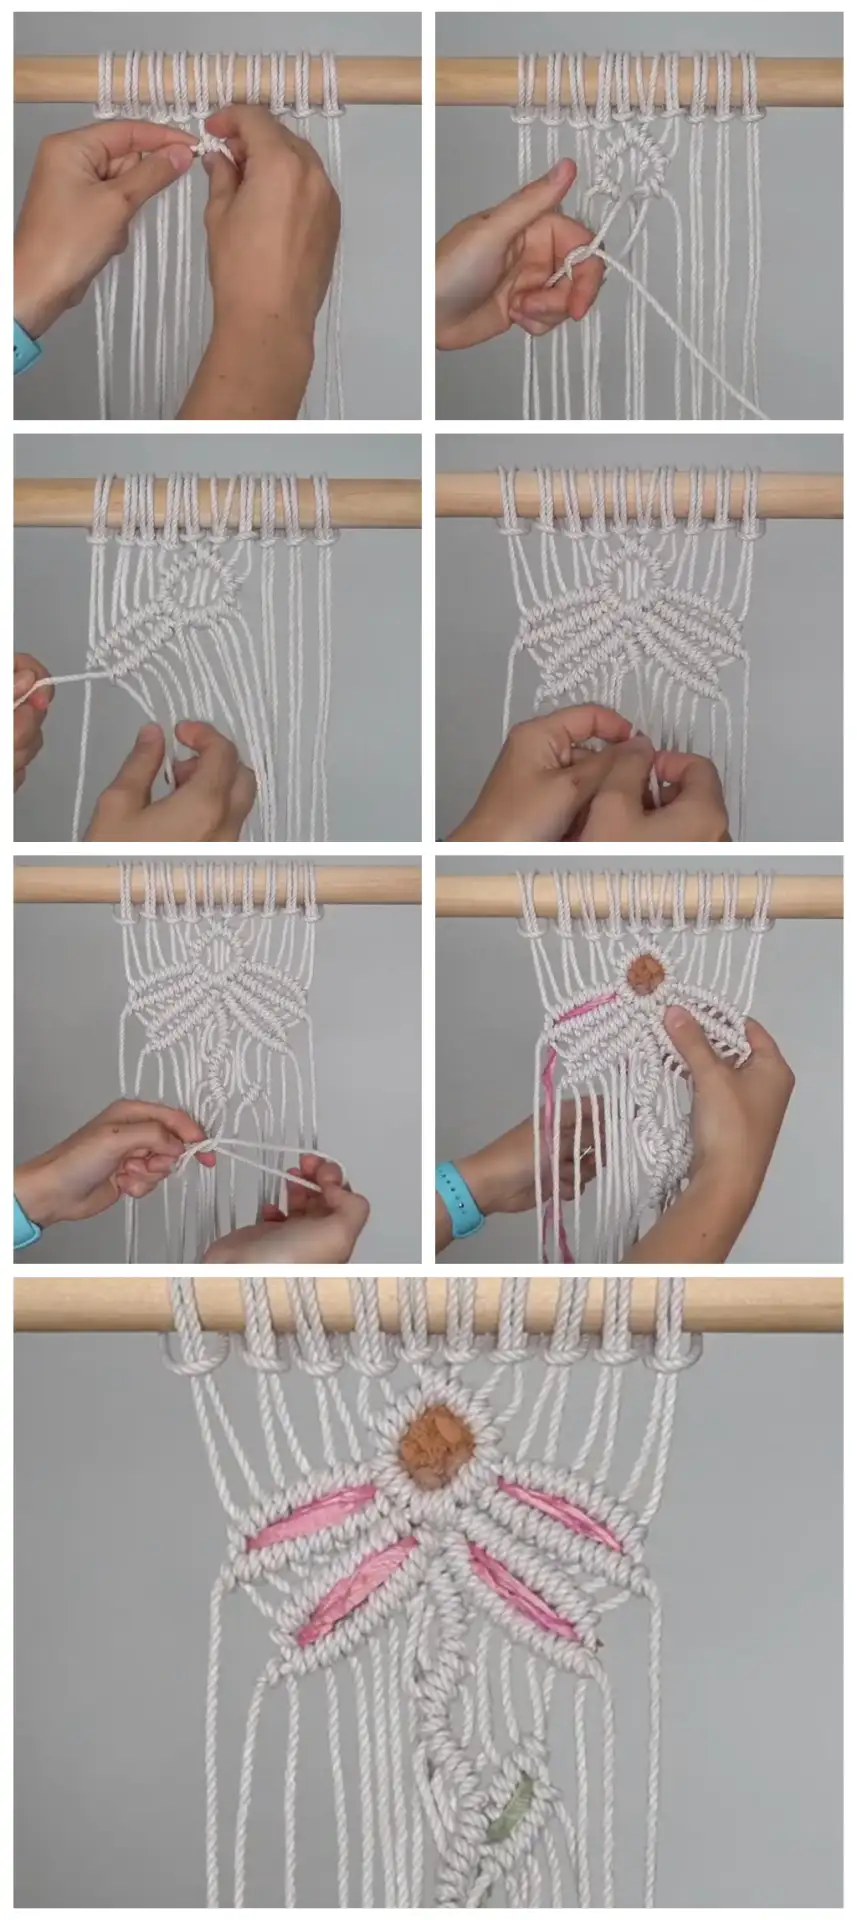
How about we begin.Cut 10 bits of 4mm rope, each piece is 8 ft long. I’m utilizing the shading ivory – this rope alongside various different supplies can be found in my shop. One of my strings was somewhat short when I completed this example yet I’ve added a piece to the length for you so 8 ft ought to get the job done. Overlap each piece down the middle and append to your dowel or driftwood utilizing a Lark’s Head Knot. Cross the ninth and twelfth ropes before your work and bind a half hitch with every one of the two center lines as I’ve done here. Utilizing similar working ropes attach another half hitch with each outwardly of the crossed ropes.
Utilizing a similar 2 filler ropes tie 2 more DHHKs on the right and left sides of your work. Utilizing a similar 2 filler strings tie 2 more DHHKs on the right and left sides of your work this time working inwards. Cross the two filler strings and tie one more dhhk on each side around both filler ropes.
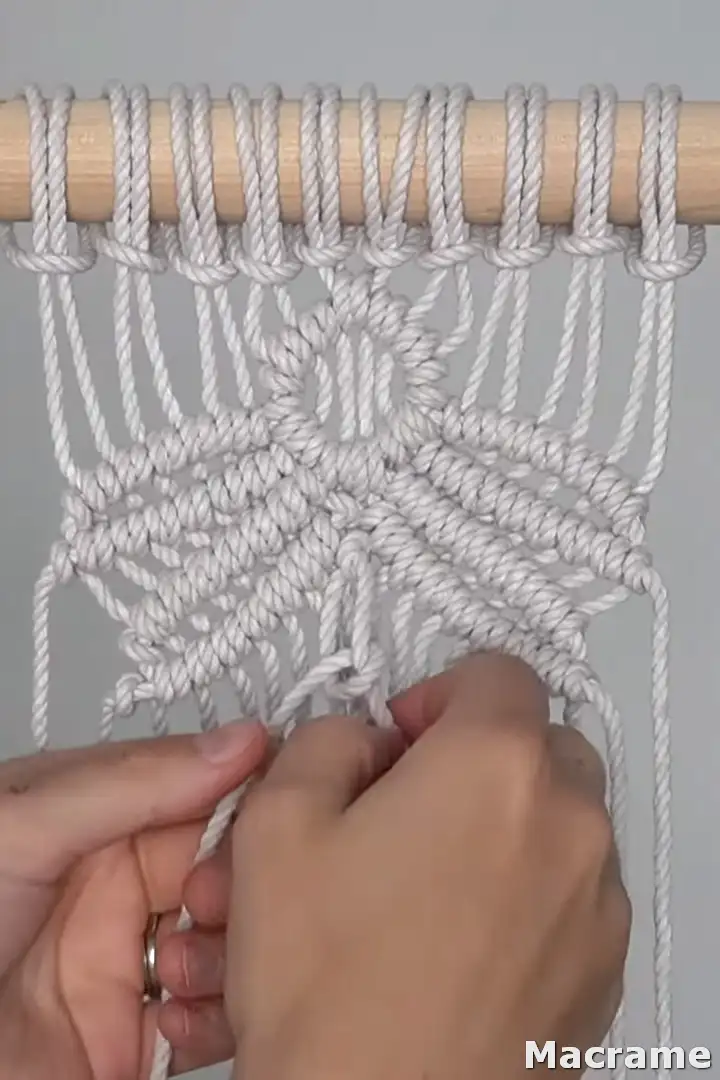
Utilize the seventh rope from the right as your filler line and secure 6 dhhks working and to one side. Utilize the eighth line from the left as your filler line and secure 7 dhhks working and to one side. Leave a touch of room in the middle of the last column and this line to make the petal.
Utilize the ninth rope from the left as your filler rope and secure 7 dhhks working and to one side. Utilize the tenth string from the left as your filler line and secure 8 dhhks working and to one side.
Utilize a similar technique and make 2 additional petals on the right half of your work.
Utilize within left string as your filler string and secure 3 dhhks working and to one side. Utilize a similar filler string and tie 3 dhhks working to one side. Utilize a similar filler line and secure 3 dhhks working and to one side.
Utilize the fifth line from the right as your filler rope and secure 2 dhhks working and to one side to make the top segment of the leaf.
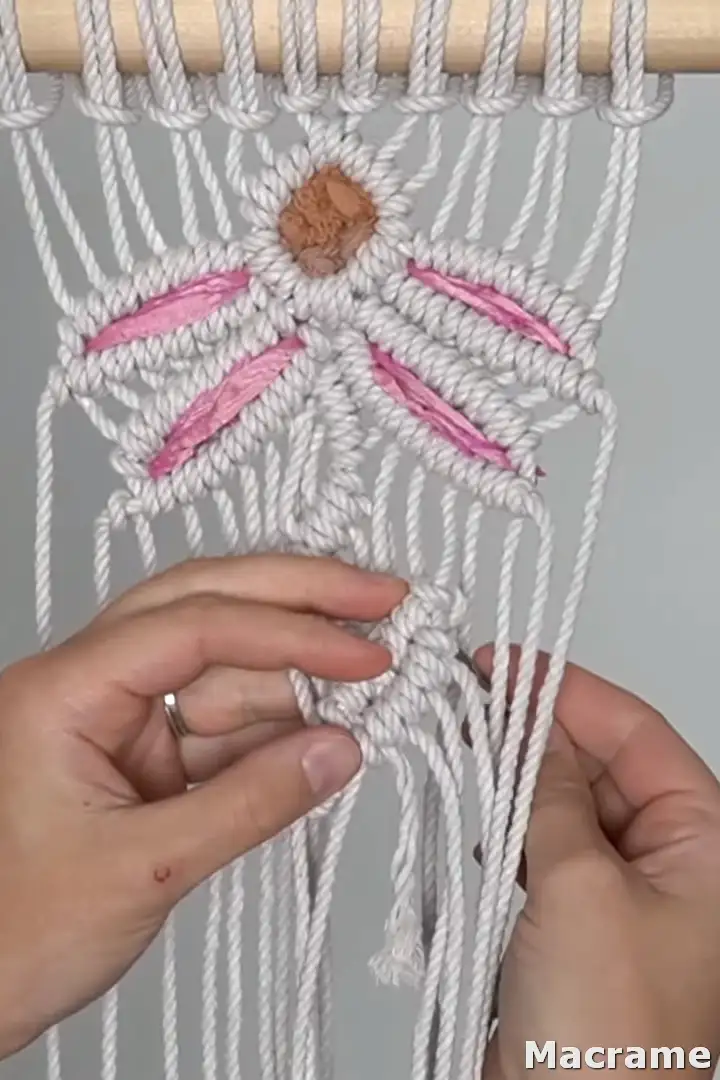
Move back to the stem and utilizing a similar filler rope tie 3 more dhhks working down and to one side.
Move back to the leaf and utilizing a similar filler rope tie one more dhhk to associate the leaf to the stem. Utilizing the current fifth line from the right as your filler rope tie 4 dhhks working to one side to make the base segment of the leaf.
Move back to the stem and utilizing a similar filler string tie one more dhhk working to one side.
Cut 4 2-ft pieces sari silk lace in the shading fuchsia and 1-ft piece of sari silk lace in the shading delicate green. Put away until further notice. Cut 2-ft bits of cotton frizz strip, one in the shading caramel and one in the shading mocha. Snatch the caramel lace and utilizing an embroidery needle weave the strip to and fro through the top segment of the blossom with the goal that it fills the top half. Get the mocha lace and weave the lace to and fro with the goal that it fills the base segment. Remove the abundance lace at the rear of your work.
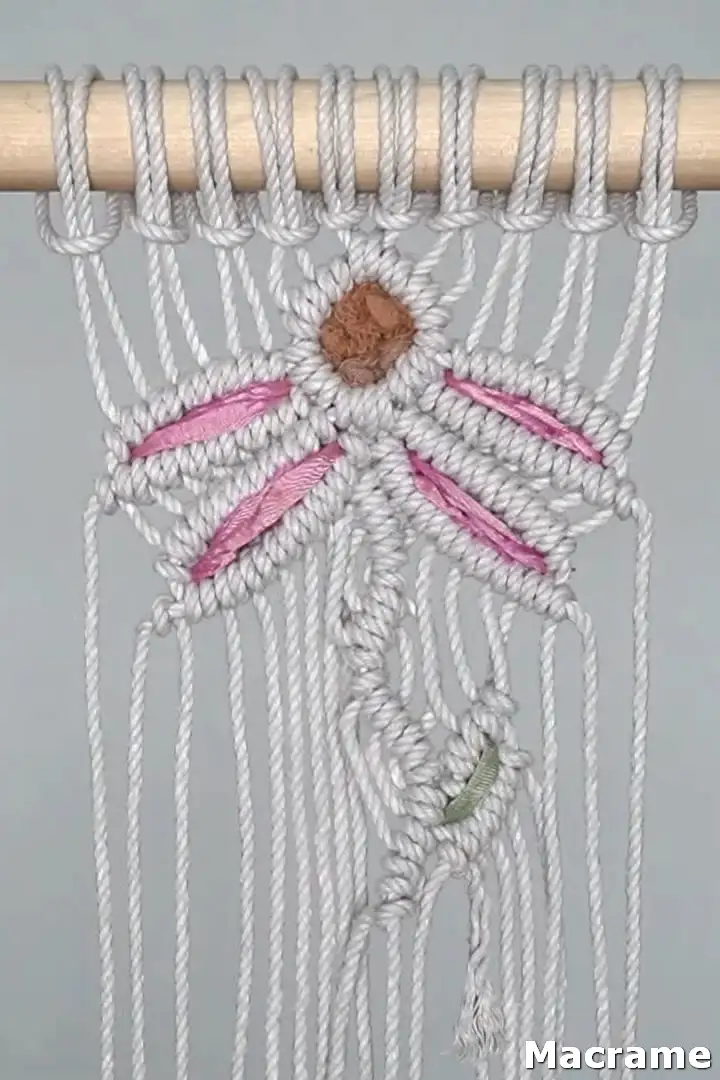
Get a piece of the red lace and string it through the highest point of the petal and afterward the lower part of the petal multiple times. Rehash that interaction for the 3 different petals.
Utilizing the delicate green strip utilize a similar interaction to fill in the leaf.
A debt of gratitude is in order for watching!