Table of Contents
Diy Macrame
MACRAME – Diy Macrame Christmas Ornaments
For many people, the term “macrame” brings to mind images of fishing from the early 19th century. This technique was used not only for that purpose, but also to make beautiful works of art that could be hung on walls. Two different kinds of knots were used in the making of these pieces: simple macrame and more complex macrame.
So, how to make a macrame Christmas ornament?
A simple macrame Christmas ornament is just a piece of tubing with a comb on one end and a ring on the other. The rings will serve as handles so that you can tie the other end of the tube onto itself or to something else so that it can be hung. How to make a MACRAME is really quite simple. In fact, once you’ve mastered the basic techniques, you’ll find it easy to make a lot of different types of macrame necklaces, bracelets, purses, belts and glass ornaments.
You should know that there are a lot of different ways to make ornaments. However, when you’re using macrame, you can choose to use one method or create a unique look by combining different techniques. So, for instance, if you are going to make a strand of pink and white macrame that you will attach to a tiny Christmas star, then you could make a beautiful, unique “Thank You” message by twisting two of the strands of pink ribbon into a triangle. You could also make even more intricate messages by wrapping the star around several different strands of white or pink ribbon. You don’t have to be an artist to pull off this type of macrame ornament.
Some people choose to use real letters in their homemade ornaments. You can find free patterns for diy macrame christmas ornaments on the Internet. However, if you choose this route, be sure to let someone know who can be responsible for the safety of your macrame project. Test a small number of knots before trying to complete a large display.
If you’re concerned about how thick or thin your macrame ornament should be, remember that the thickness will only be a factor for beginners. For experienced crafters, the best suggestion is for the macrame ornament to be a little bit thinner than your average shoelace. For example, a rope length of macrame ribbon can be wrapped individually and still hang beautifully. If you prefer, you can always tie several lengths of these beautiful strings together to form a single, thicker ribbon.
DIY Macrame – Christmas Stars, Star Ornaments New
Materials:
– 9 ft of 2mm Classic String (Colour: Natural)
– 9 ft of 3mm Metallic String (Gold)
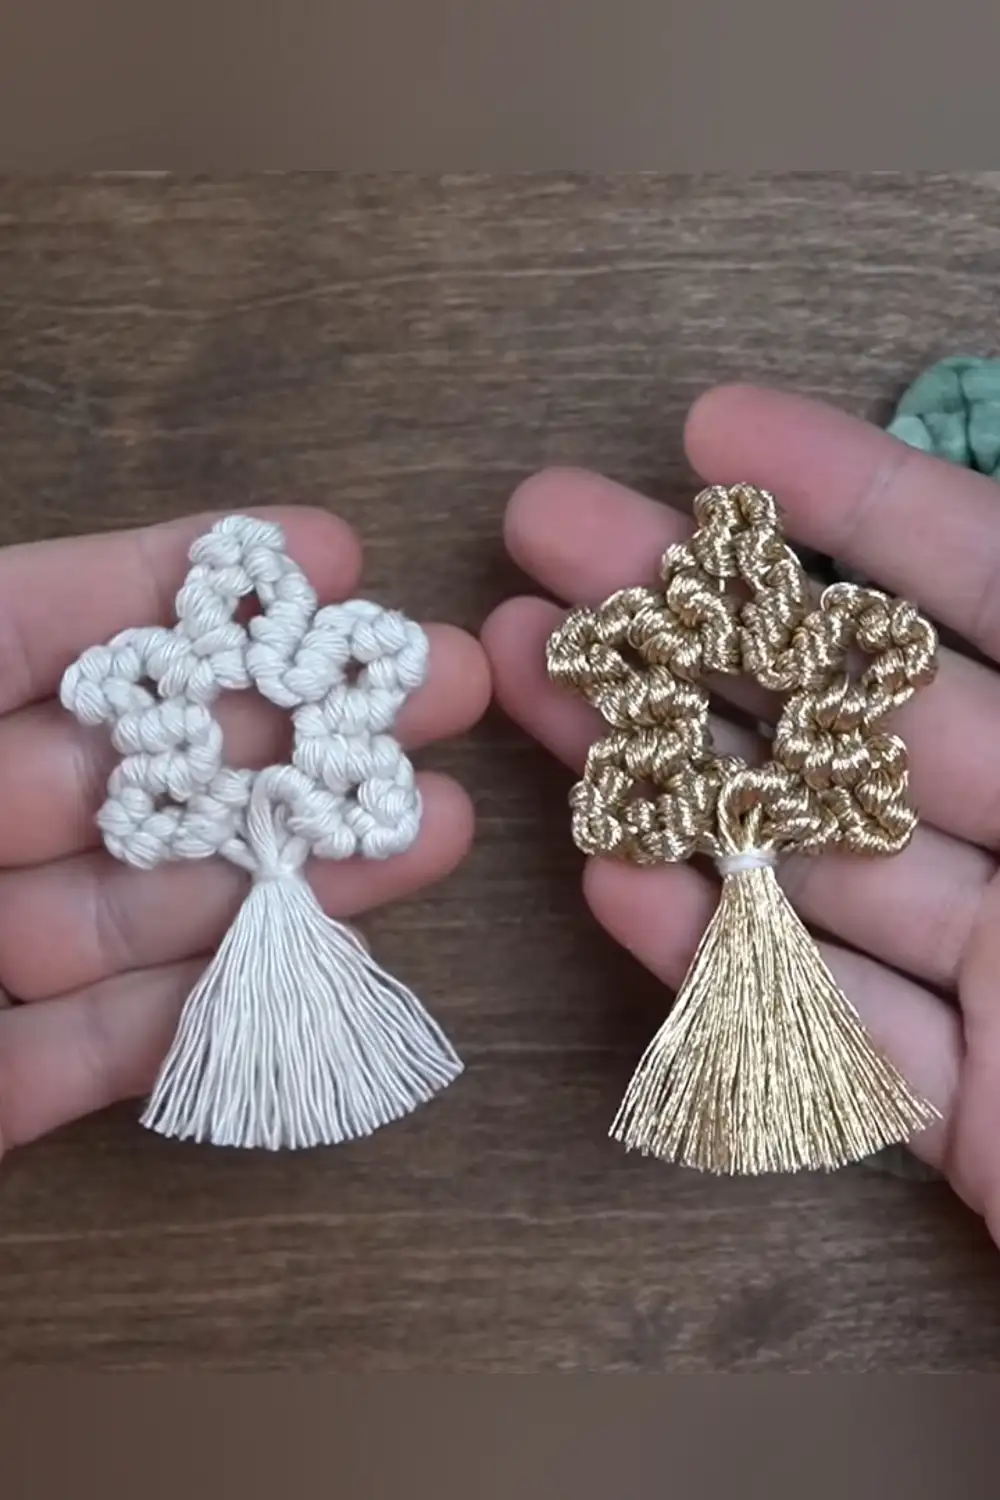
– 12 ft of 5mm Hand Painted Super Soft String (Colour: Foggy Forest)
– Sewing ThreadI have a fun star ornament tutorial for you today. I’ll take you through how to make this ornament with 2mm string but you can also make it with 3mm and 5mm string (as I’ve done here). I’ll go over the details to create this ornament using 3mm and 5mm string at the end of the tutorial.
As always, I really appreciate your support – a like, comment and subscribe go a long way. Thanks so much. Let’s get started.
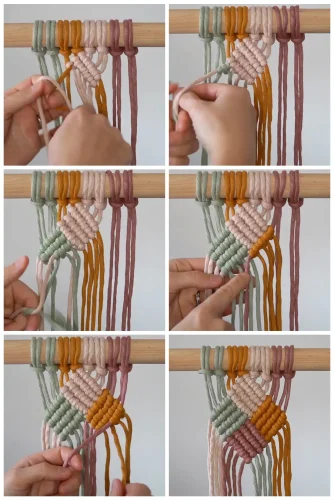
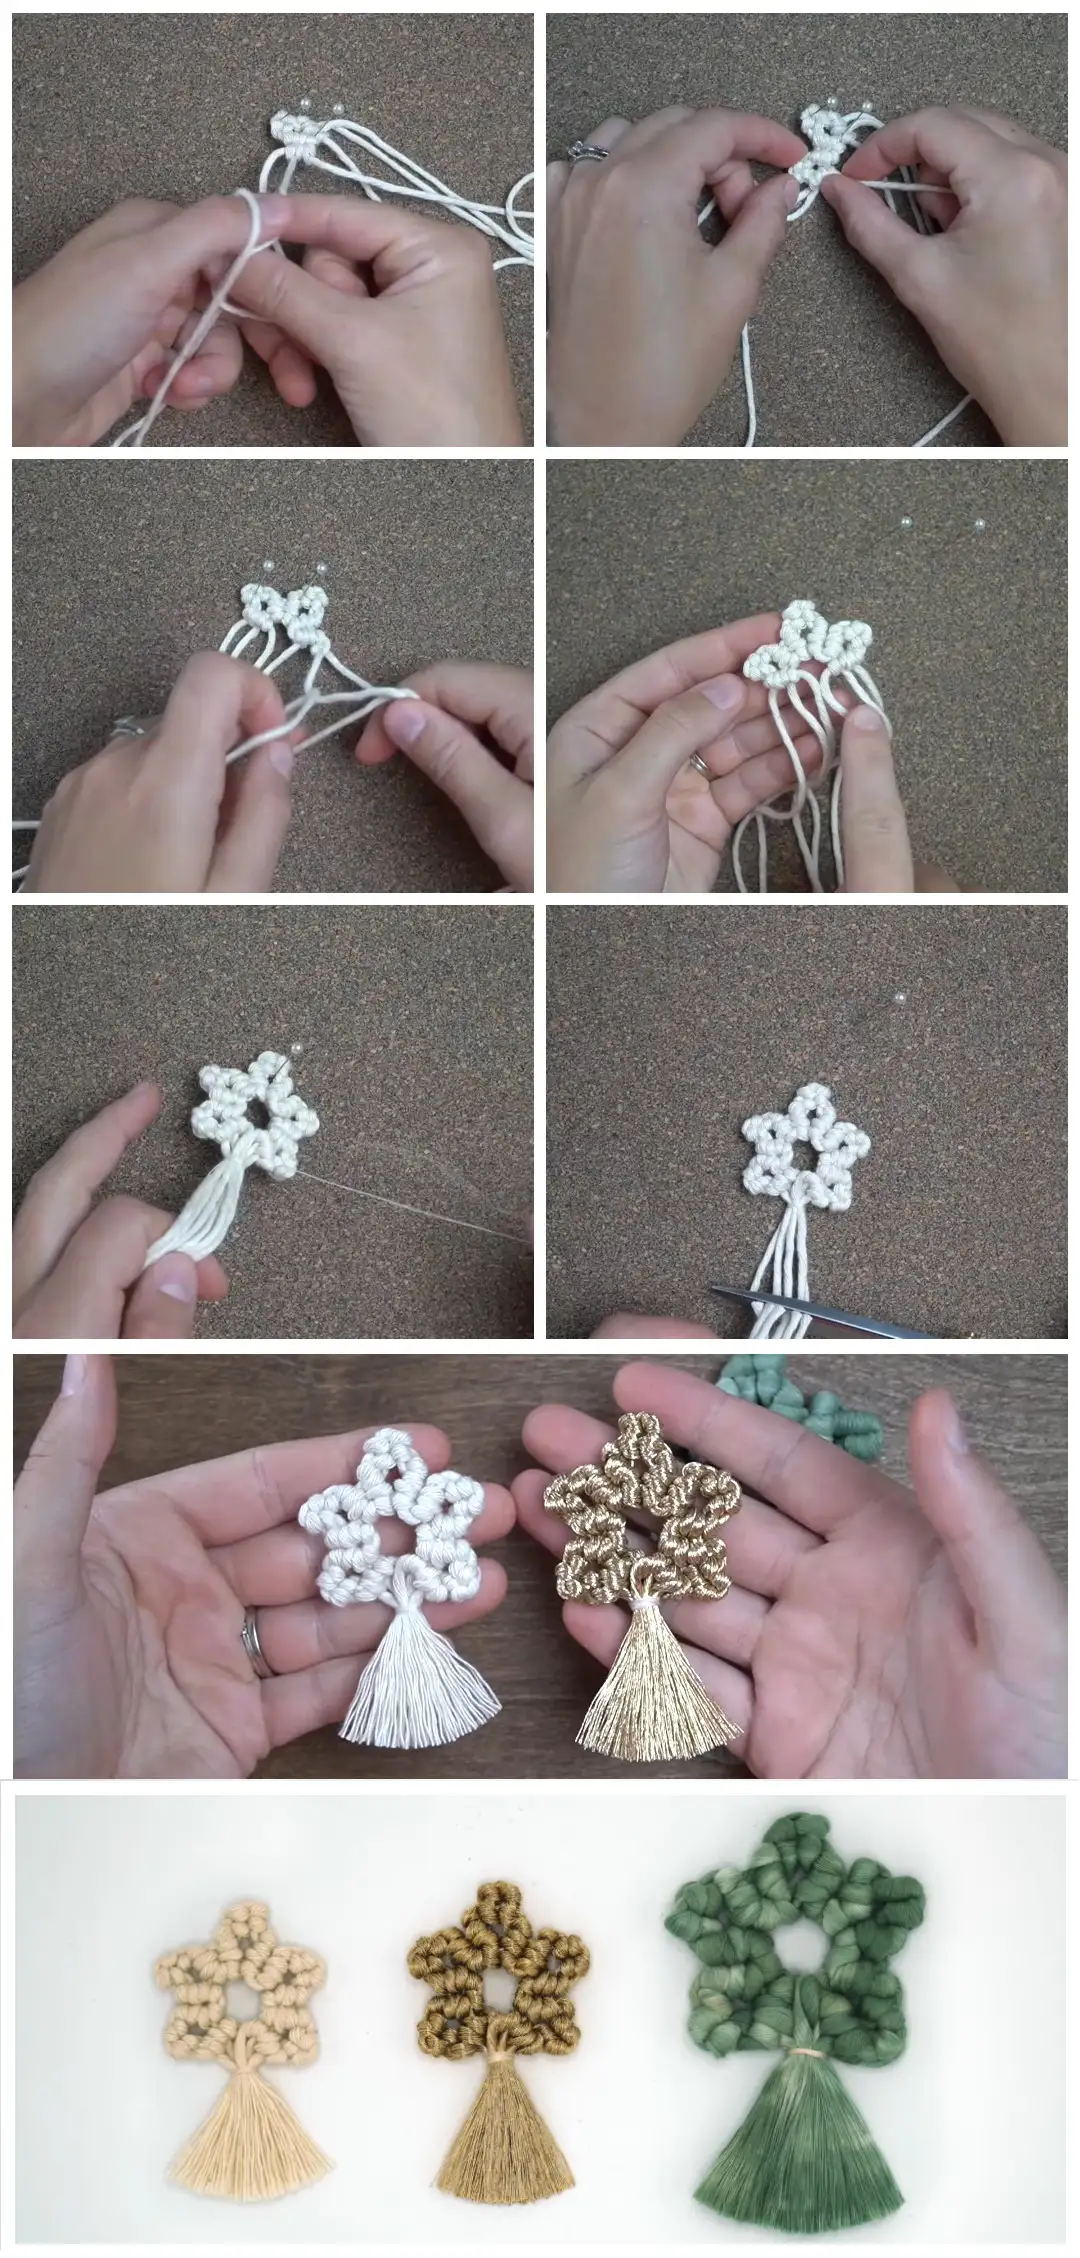
Cut 3 pieces of 2mm string, each piece is 3ft in length. Fold one piece in half and use a pin to attach it to your cork board. Grab another piece of string and fold it in half to find the centre. Tie a vertical double half hitch knot to the left filler cord. Tie another vertical dhhk to the right filler cord.
Use the left cord as your filler cord and tie a dhhk working to the right. Repeat on the right side of your work.
Grab another piece of string and fold it in half to find the centre. Tie a vertical dhhk to the second cord from the left. Tie another vertical dhhk to the next cord on the right.
We have now made one of 5 points on the star. The method to create the first point is different than the rest. I’ll now show you how to create the other 4 points (two on the left of the first point and two on the right).
Use the middle left cord as your filler cord and tie 2 dhhks working to the left. Use the second cord from the left as your filler cord and tie one dhhk working to the left.
Use the same filler cord and tie one dhhk working to the right. Use the left cord as your filler cord and tie 2 dhhks working to the right.
Repeat that process to create one more point on the left.
We will use the same process to create the two points on the right but work in the opposite direction. Sometimes it is a bit tricky to do that so I’ll take you through how to create the first point on the right then you’ll need to create one more using the same process.
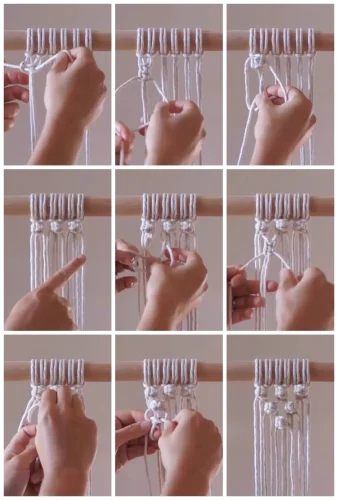
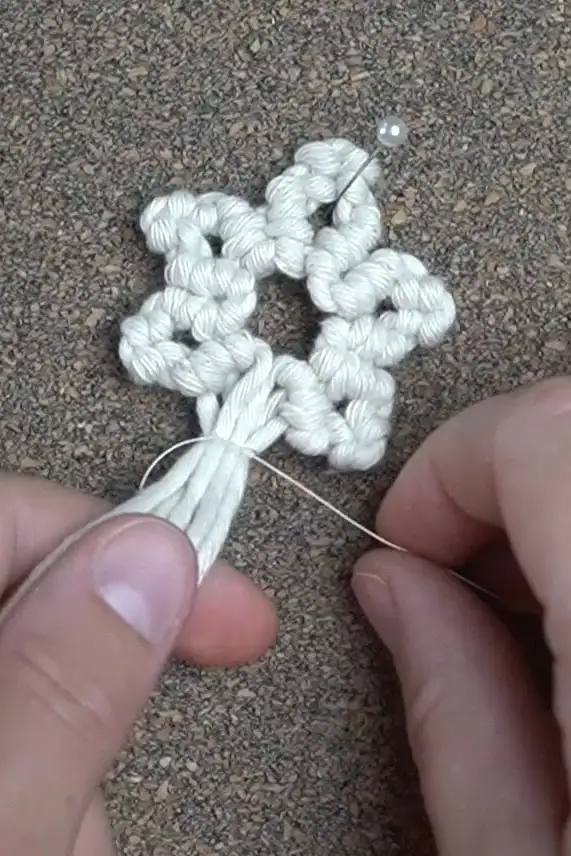
Here is what it should look like once finished. To attach the ends at the bottom grab a piece of sewing thread, tie a double knot to attach it and then wrap it around the ends a few times. Tuck the ends of the sewing thread into the back of your work to hide them. Cut the bottom of the string as you see fit and brush it out to create a bit of fringe.
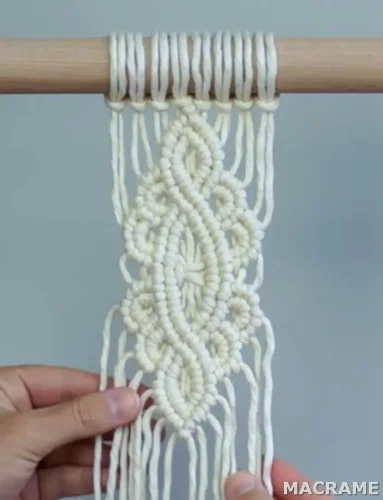
These are fun little decorative pieces that could be used as decor on the dinner table or as ornaments by simply adding a piece of string to the top.
To create the additional stars you’ll need 3 pieces of 3mm string, each piece 3 ft in length and/or 3 pieces of 5mm string, each piece 4 ft in length.