Table of Contents
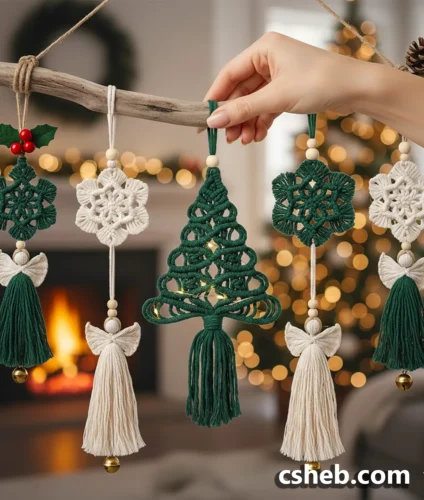
Diy Macrame Easy Cross Pattern Tutorial
Macramé is a style of knotted textile that is becoming popular today. It is a unique style that combines knotting and weaving techniques. Whether you’re looking for a stylish scarf, or a unique home accent, you’ll find it here. Let’s take a closer look at macramé. Here are some of the ways to incorporate this beautiful style into your home. Read on to learn more about the different types of macramé and the different styles to choose from.
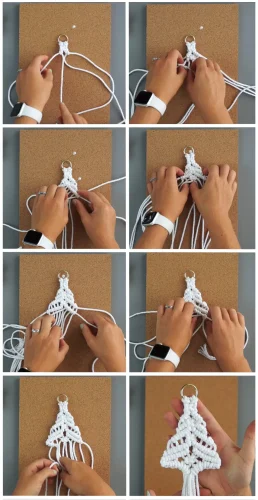
Macrame supplies include the twine and a knotting board. A knotting board is a flat piece of cork, cardboard, or foam that is used to hold the string horizontally while you’re learning the art of macrame. The next step in making a beautiful piece of macrame is to secure the design with T-pins at set intervals. Then, you’re ready to begin.
To create a beautiful piece of macrame, you need to choose the right cord and the right size hook. Use any kind of cord you want. You can mix different types of material to create a unique design. If you’re making a wall hanging, you can combine materials to add color to the piece. Once your macrame project has dried, you’ll have to leave it in a sunny place for a few days to let the colors absorb.
You can buy patterns and books on macrame to help you create unique designs. You can also make your own patterns and sell them on Etsy. You can also learn to macrame by watching tutorials on YouTube. Just be sure not to copy someone else’s design. While it’s tempting to copy a designer’s pattern, you’ll never know if it’s a good idea. You can pick the parts of their design that you like best and make your own version.
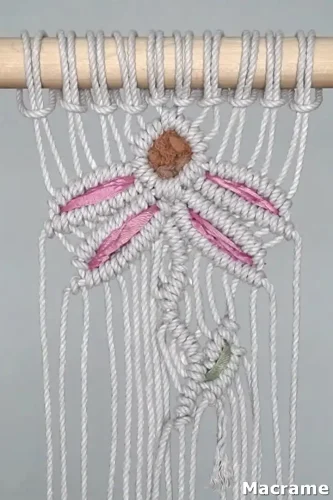
Before you begin your macrame project, prepare your materials. You’ll need a macrame cord and a fabric stiffener. You’ll need fabric dye and a few pieces of macrame cord for the center strings. If you’re looking to create a feather with a more complex design, you can purchase a macrame kit that has all the supplies you need. Then, you can start creating beautiful, handcrafted items for friends and family.
Creating macrame feathers is a fun, easy way to learn the craft. You can use these colorful macrame products as decorative accents in your home. These feathers are also a great way to make unique jewelry. They can be worn as earrings, or as purse decorations. You can even make them as part of your own outfit! You can be creative when making macrame items. If you don’t want to be a professional, you can use tutorials that show you how to make handmade pieces.
Another great way to use leftover cord is to make macrame feathers. If you have leftover cord after making wall hangings, use them as decoration. You can even experiment with different textures and choose the cords that you use for your macrame projects. The cords used in this type of project should be three ply or braided. They should be made of different materials, such as hemp or jute. Depending on the size of your feathers, you can make one with several knots.
The first step to learn macrame is to buy cord. Using cotton rope is the easiest and cheapest option for beginners. Single-stranded strings are more difficult to use and can cause accidental untwisting while knotting. Choosing the right cord for your macrame project depends on the size of the project. Once you have chosen the size of the cords, you can begin making your new masterpiece. Afterwards, you can make some decorative items with your macrame skills.
A macrame-knotted cord is a versatile and durable material. It can be used for many purposes. For example, a macrame-knotted belt is the perfect accessory for a winter coat or a summer skirt. It can also be used as a decorative accent in a holiday-themed room. A Macrame-knotted belt is a great way to add a boho touch to a scarf.
Materials:
– 4mm Rope (Colour: Vintage Green)
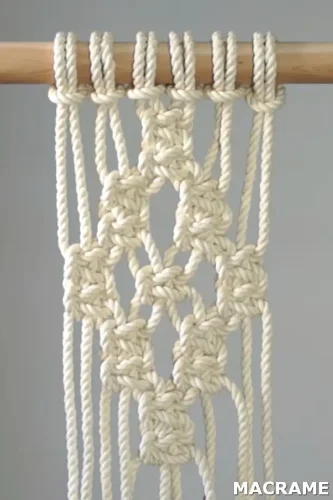
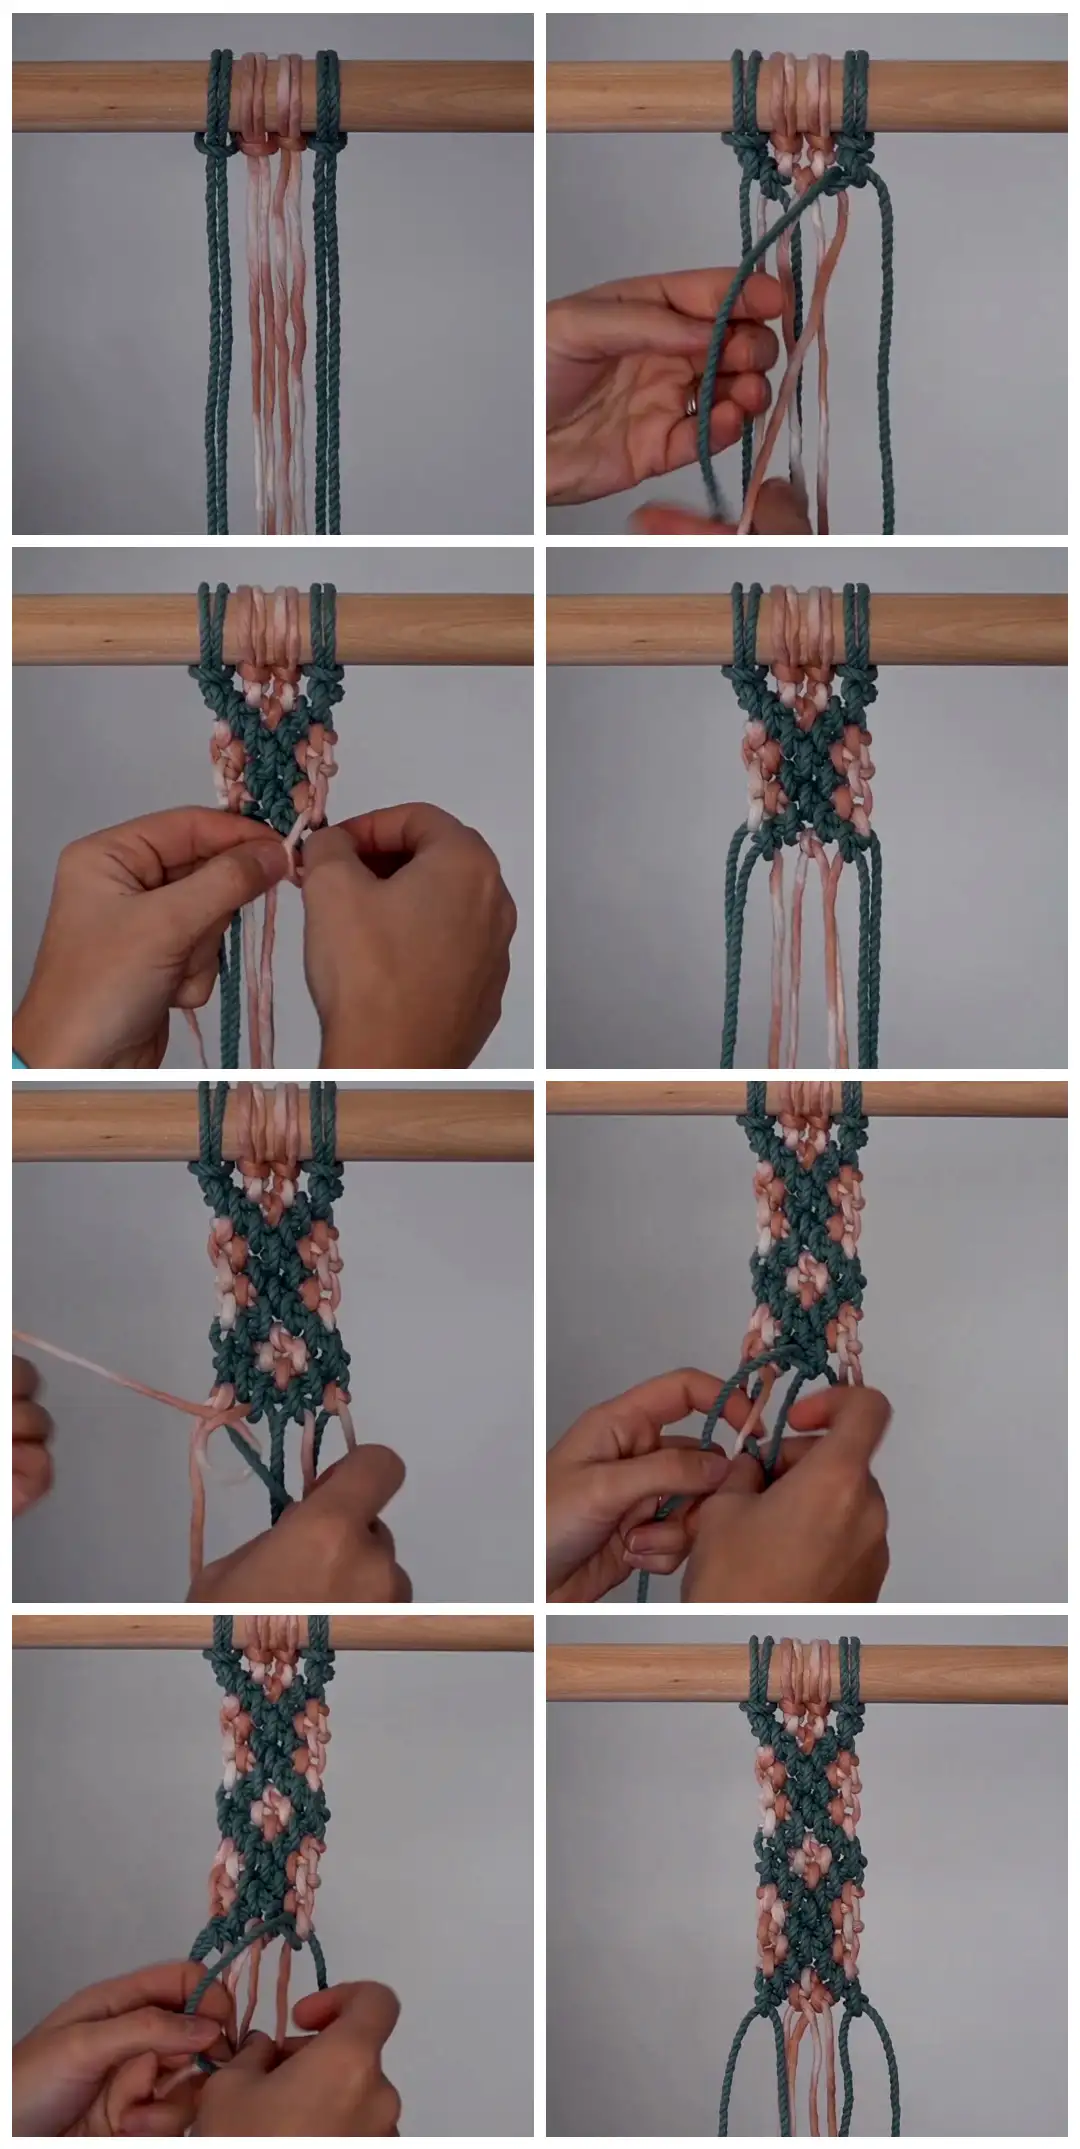
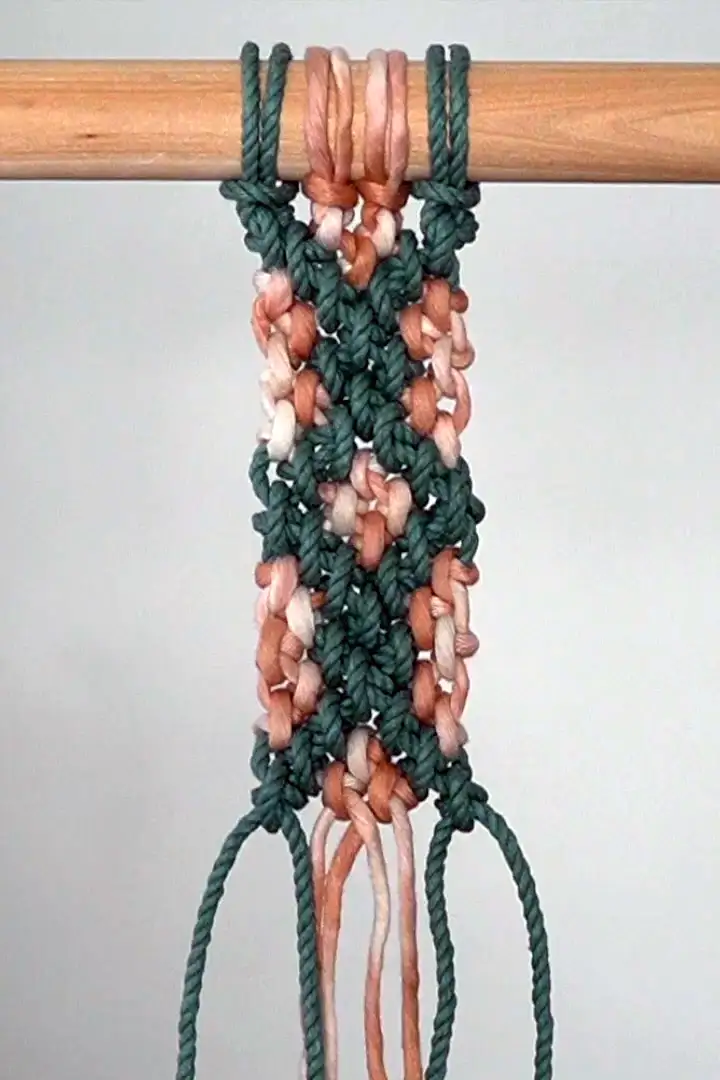
– 5mm Hand Painted String (Colour: Cinnamon Swirl)I have a X or cross pattern for you today. I started a new series at the beginning of January focusing on the reverse double half hitch knot and this tutorial is apart of that series. If you’ve watched the other tutorials you might pick up on this pattern quickly which is great. I not only wanted to show you the pattern today but also the way that you can combine rope and string to create different textures as well as patterns within your work. Let’s get started.
Cut 2 pieces of 4mm vintage green rope and 2 pieces of 5mm hand painted cinnamon swirl string, each piece is 8ft long. Attach them to your work using a Lark’s head knot in the order you see here.Row 1 – Use the left cord as your working cord and tie 4 reverse dhhks across your work.
Row 2 – Skip the first cord. Use the left cord as your working cord and tie 2 reverse dhhks. Use the right cord as your working cord and tie one more dhhk to finish off this row.
Row 3 – Use the right cord as your working cord and tie a reverse ddhk. Use the left cord as your working cord and tie a reverse dhhk. Repeat.
Row 4 – Skip the first cord. Use the right cord as your working cord and tie a reverse dhhk. Use the left cord as your working cord and tie 2 reverse dhhks.
Row 5 – Use the left cord as your working cord and tie a reverse dhhk. Use the right cord as your working cord and tie a reverse dhhk. Use the left cord as your working cord and tie 2 reverse dhhks.
Row 6 – Skip the first cord. Use the left cord as your working cord and tie 2 reverse dhhks. Use the right cord as your working cord and tie a reverse dhhk.
Row 7 – Use the left cord as your working cord and tie a reverse dhhk. Use the right cord as your working cord and tie a reverse dhhk. Repeat.
Row 8 – Skip the first cord. Use the right cord as your working cord and tie a reverse dhhk. Use the left cord as your working cord and tie 2 reverse dhhks.
If you’re wanting to finish this pattern repeat row one. If you’re wanting to repeat this pattern repeat rows 1 – 8. I’ll repeat this pattern one more time for you here.