DIY Christmas Beginner/Intermediate Macrame Tutorial: Christmas Tree Ornaments! – Please see below for materials and written instructions.
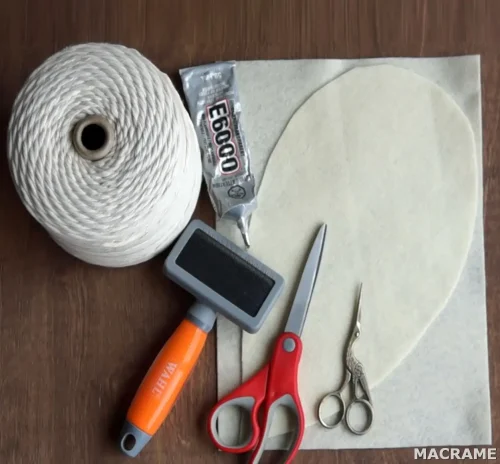
Material:
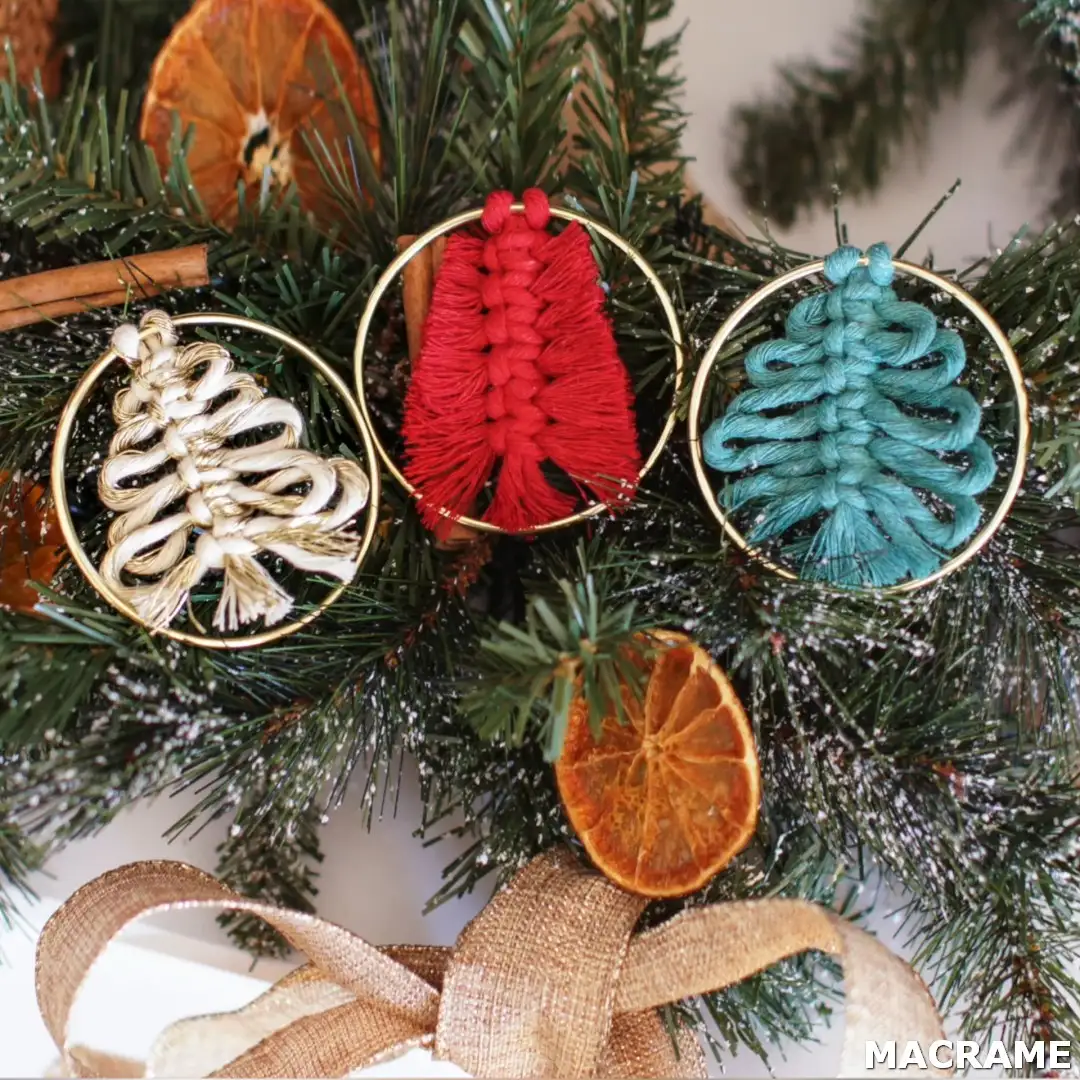
– 3mm Cotton String (Colours: Pine Green, Natural/Gold, Christmas Red)
– Gold Ring (3 Inches)
Macrame, which has been known for many years and is based on hand skill, has always been indispensable for some, although it is popular from time to time. Let’s examine together what macrame is, which is suitable for beautiful and creative work with its different techniques, and how macrame wall decorations are made.

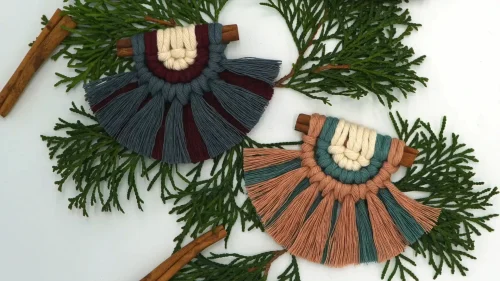
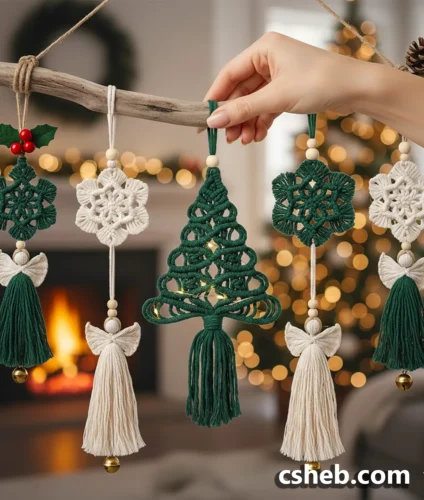
Hey guys! I have a fun and easy Christmas Tree ornament tutorial for you today. There are two variations (as seen here). I filmed myself creating all three (although the first two are the same) but I thought I’d share it all with you in case you needed a second look at the first design.
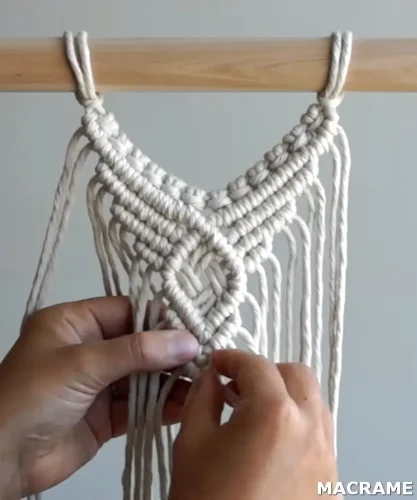
I decided to create this ornament while hanging (attached to a clothes rack with an S hook) but it could also be made on a table.
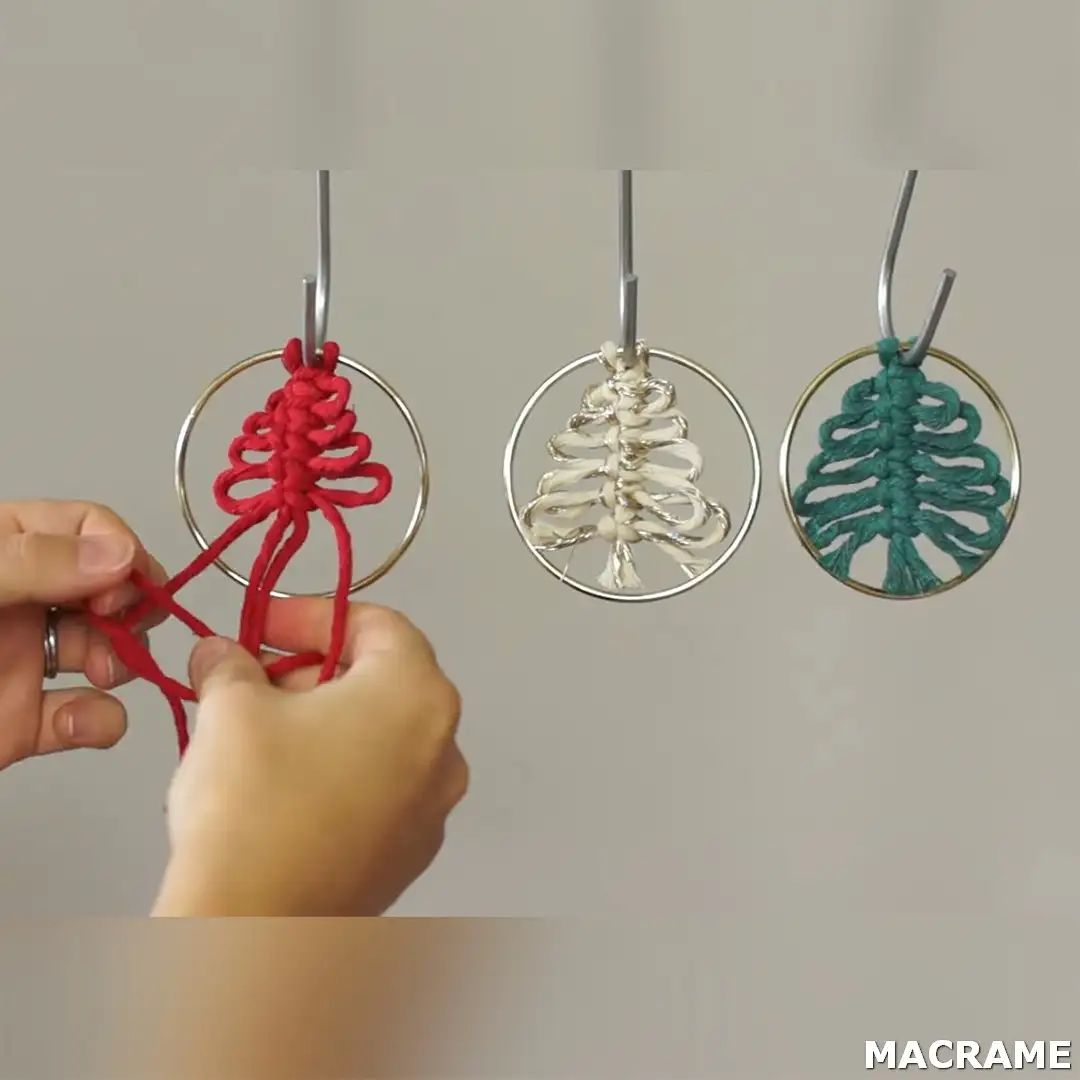
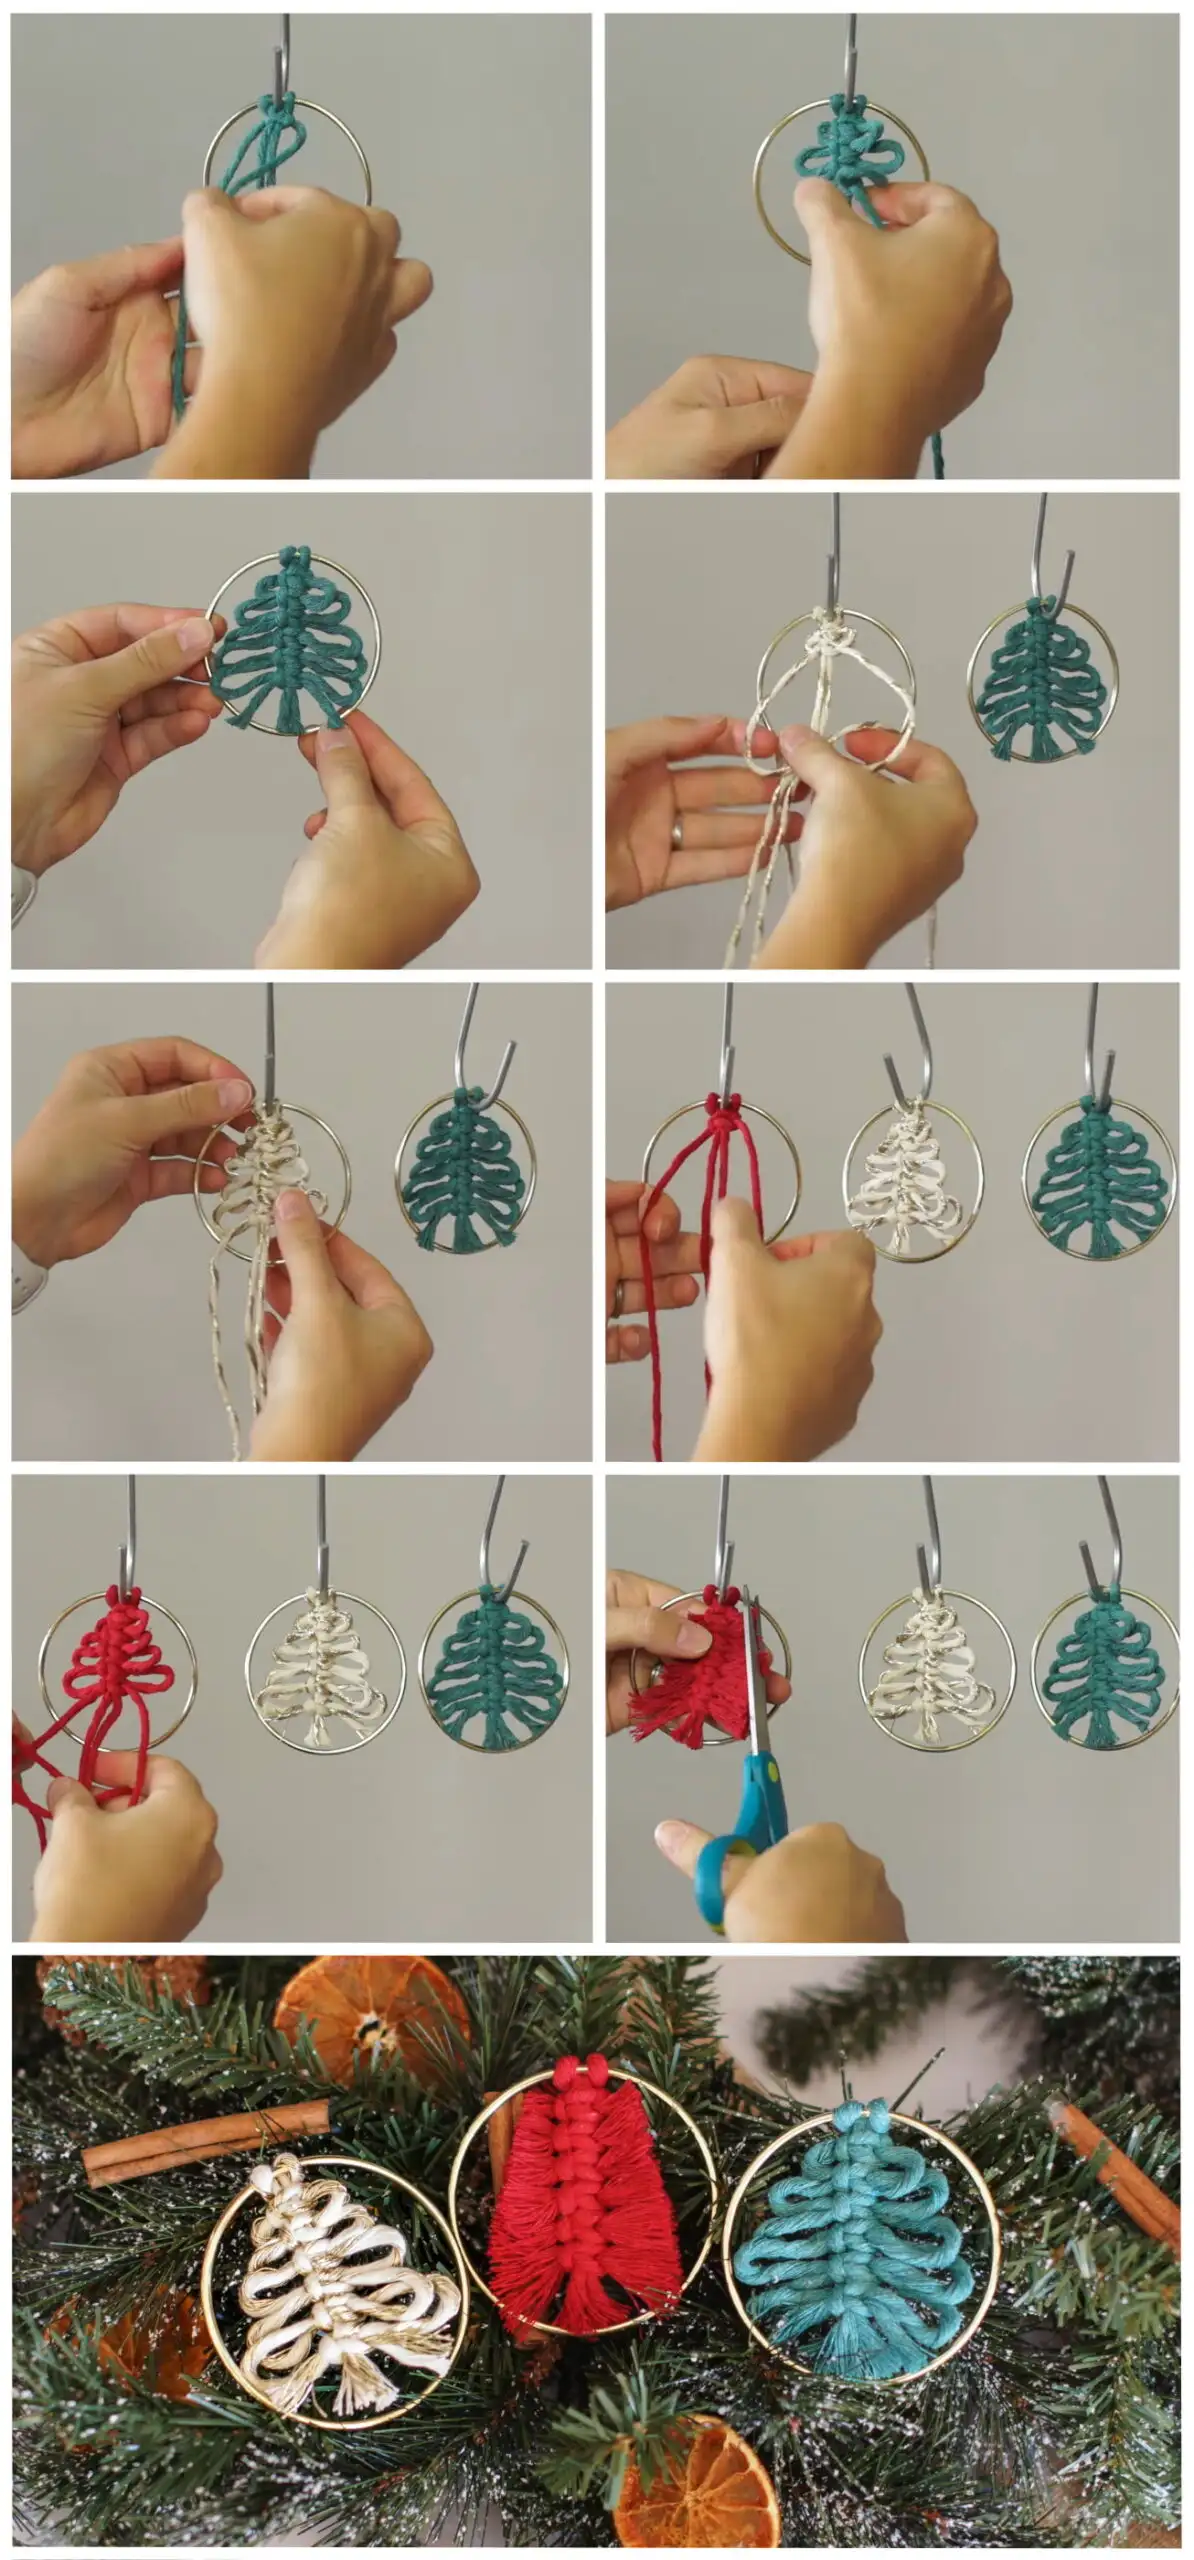
Set up – For each ornament, cut one piece of cord that is 2 ft long and one piece of cord that is 4 ft long. Fold the 2 ft piece of string in half and attach it to the top of your ring using a Cow Hitch knot. I’ve attached my S hook to the ornament in between the two cords so that it stays in place while I create the rest of the ornament.
Fold the 4 ft piece of string in half and tie a square knot. We will tie 5 more square knots with picots (6 square knots total) to create the tree. To tie your square knot with a picot simply tie your square knot down your filler cords and then push it up to sit underneath the first square knot. The more space you leave in between your square knots the bigger the picots or loops will be.
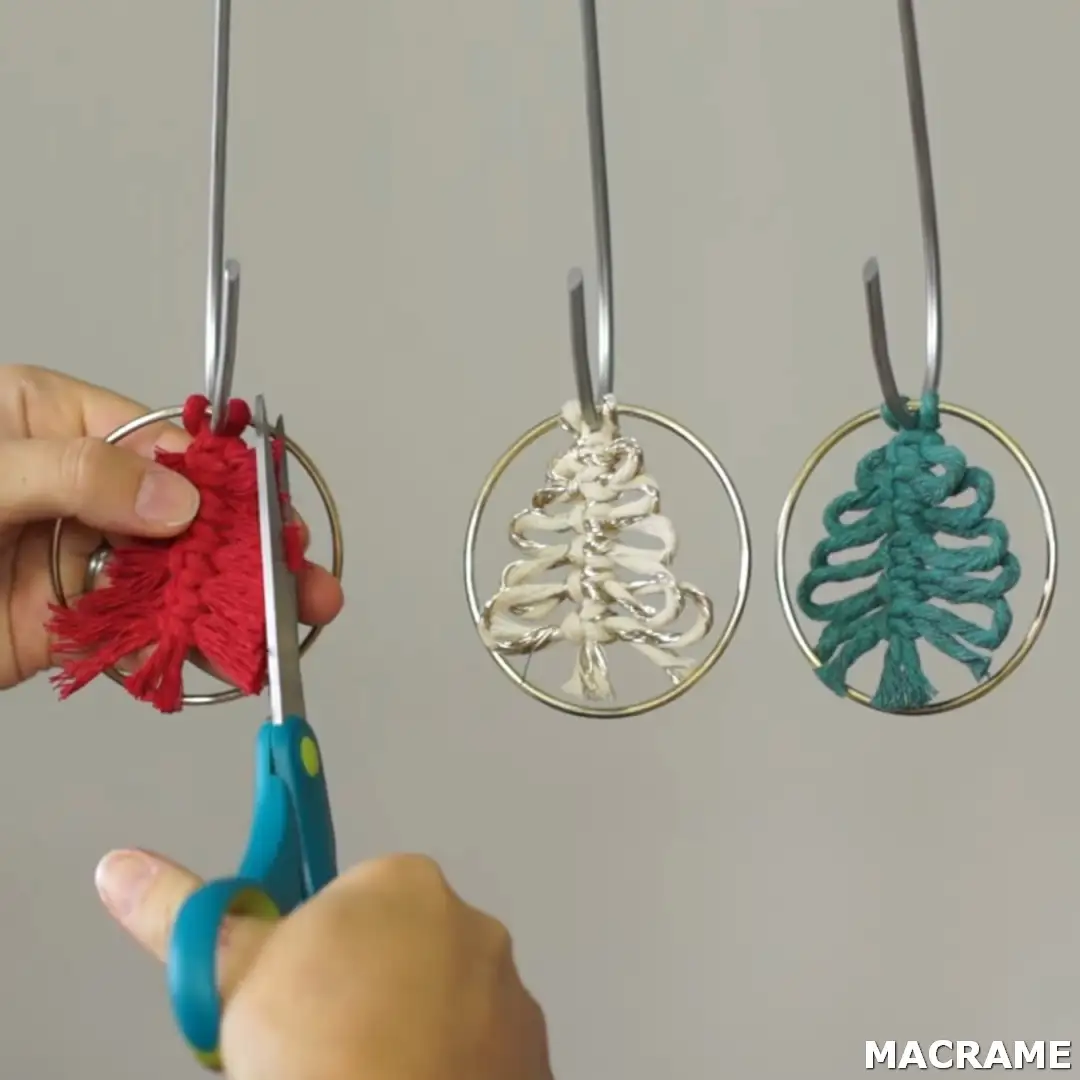
Cut the ends so that they fit nicely within the ring.
Use the same method to create the second ornament.
Use the same method to create the third ornament. To create the variation on this design cut the loops, brush them out, and then trim the sides.
Thanks for watching!