How to Make an Amigurumi Doll
Step-by-Step Guide to Crafting a Stylish and Detailed Amigurumi Doll
Table of Contents
The Harmony of Yellow and Black: Amigurumi Doll
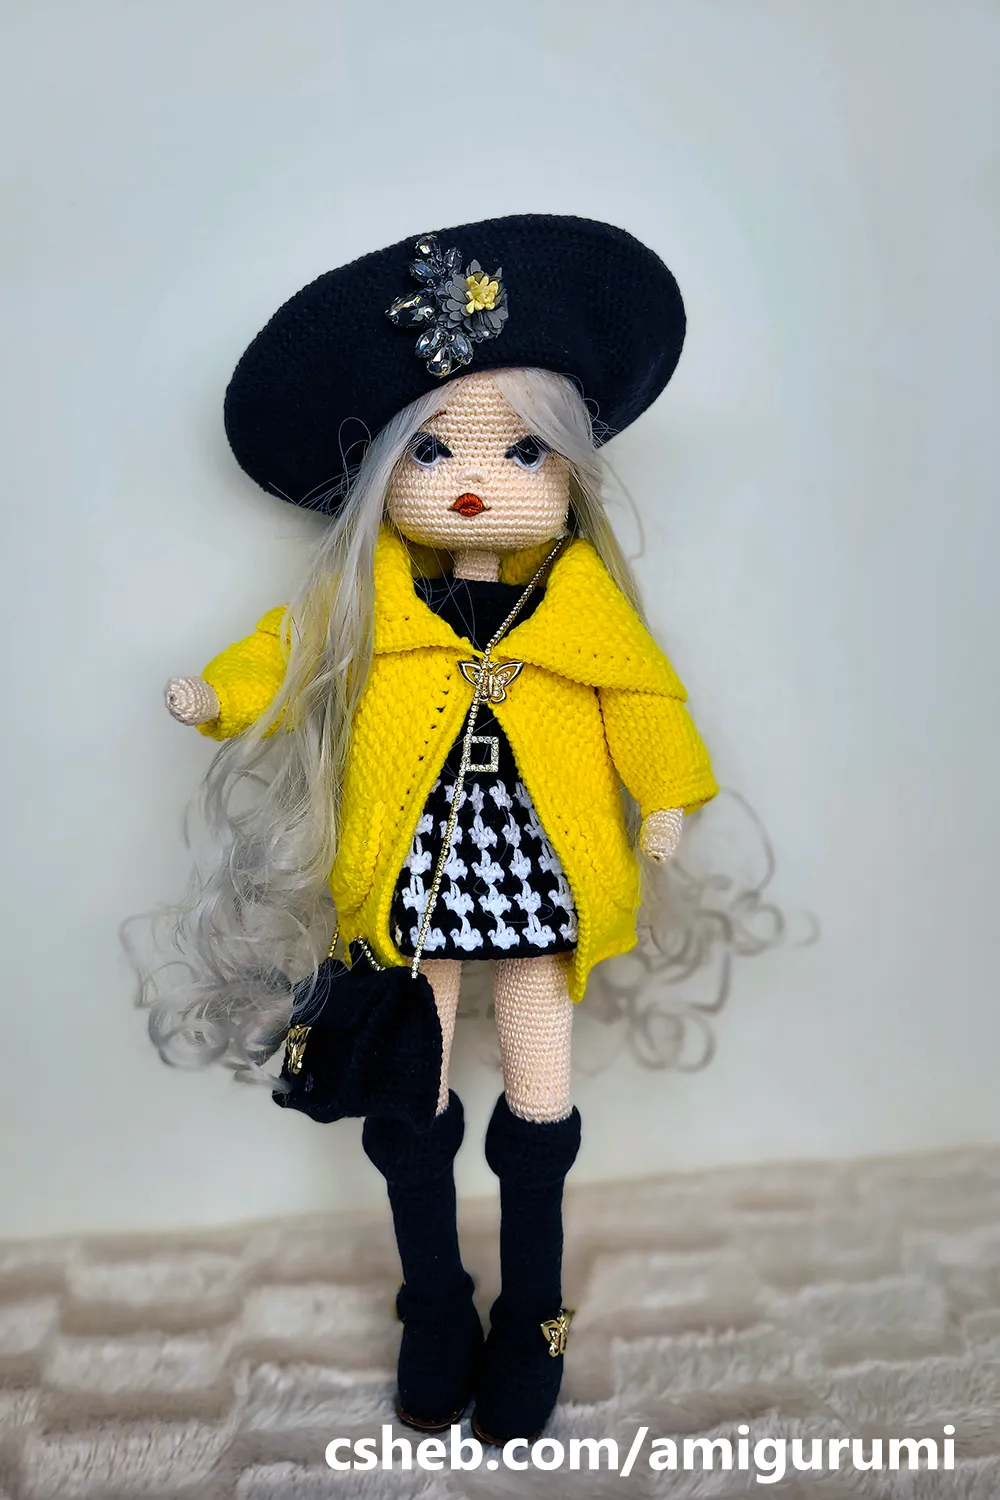
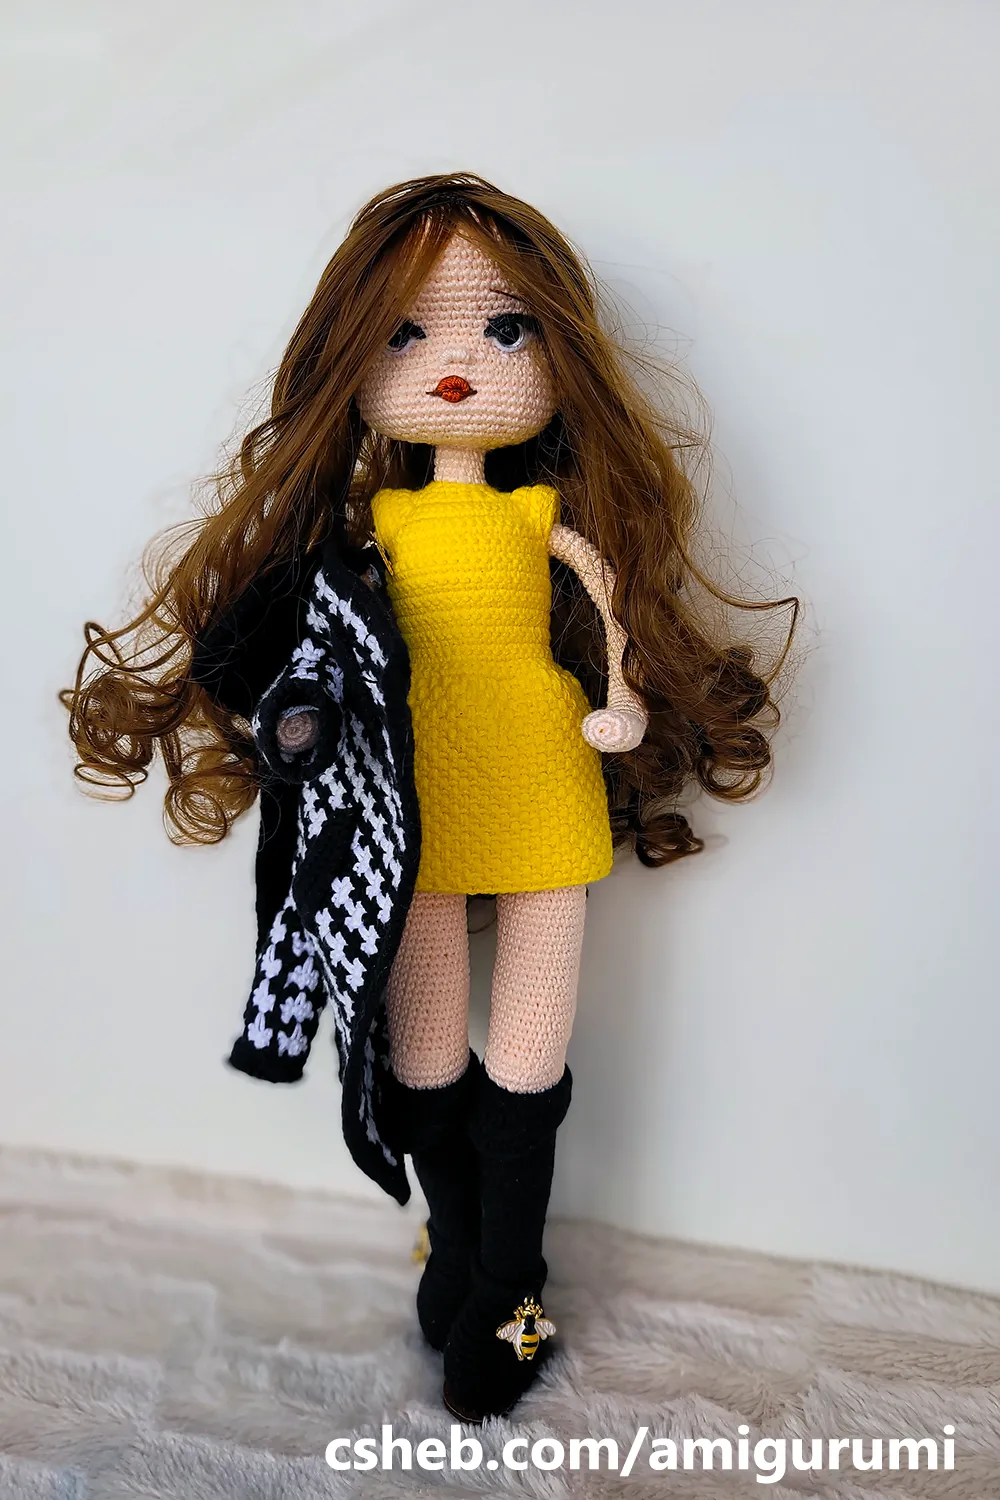
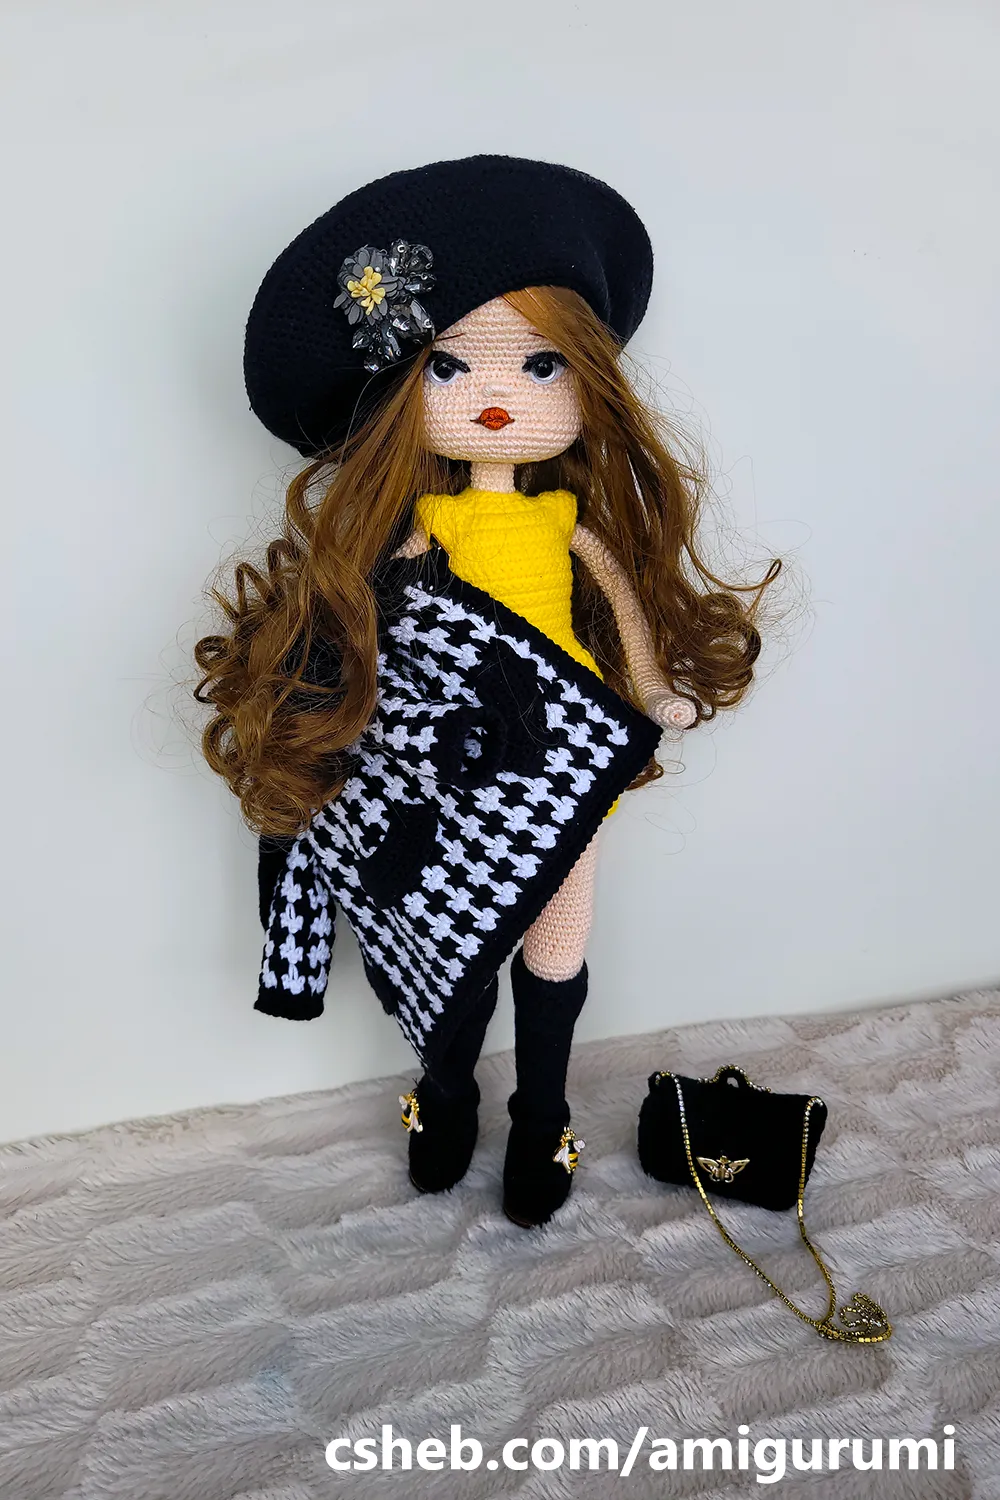
Amigurumi has become one of the most popular techniques for making handmade toys. These unique crocheted toys have gained significant attention in recent years due to their intricate details and charming designs. In this article, we will explore the process of making an amigurumi doll. We’ll go over how to create a doll similar to the stylish and detail-rich doll shown in the image, step-by-step.
What is Amigurumi?
Amigurumi is a term originating from Japan, combining “ami” (to knit or crochet) and “nuigurumi” (stuffed doll). It refers to handmade toys that are crafted by crocheting or knitting and then filled with stuffing material to give them shape. Amigurumi toys are a safe toy option for children and have also gained popularity as a hobby among adults.
How to Make an Amigurumi Doll (Similar to the Doll in the Image)
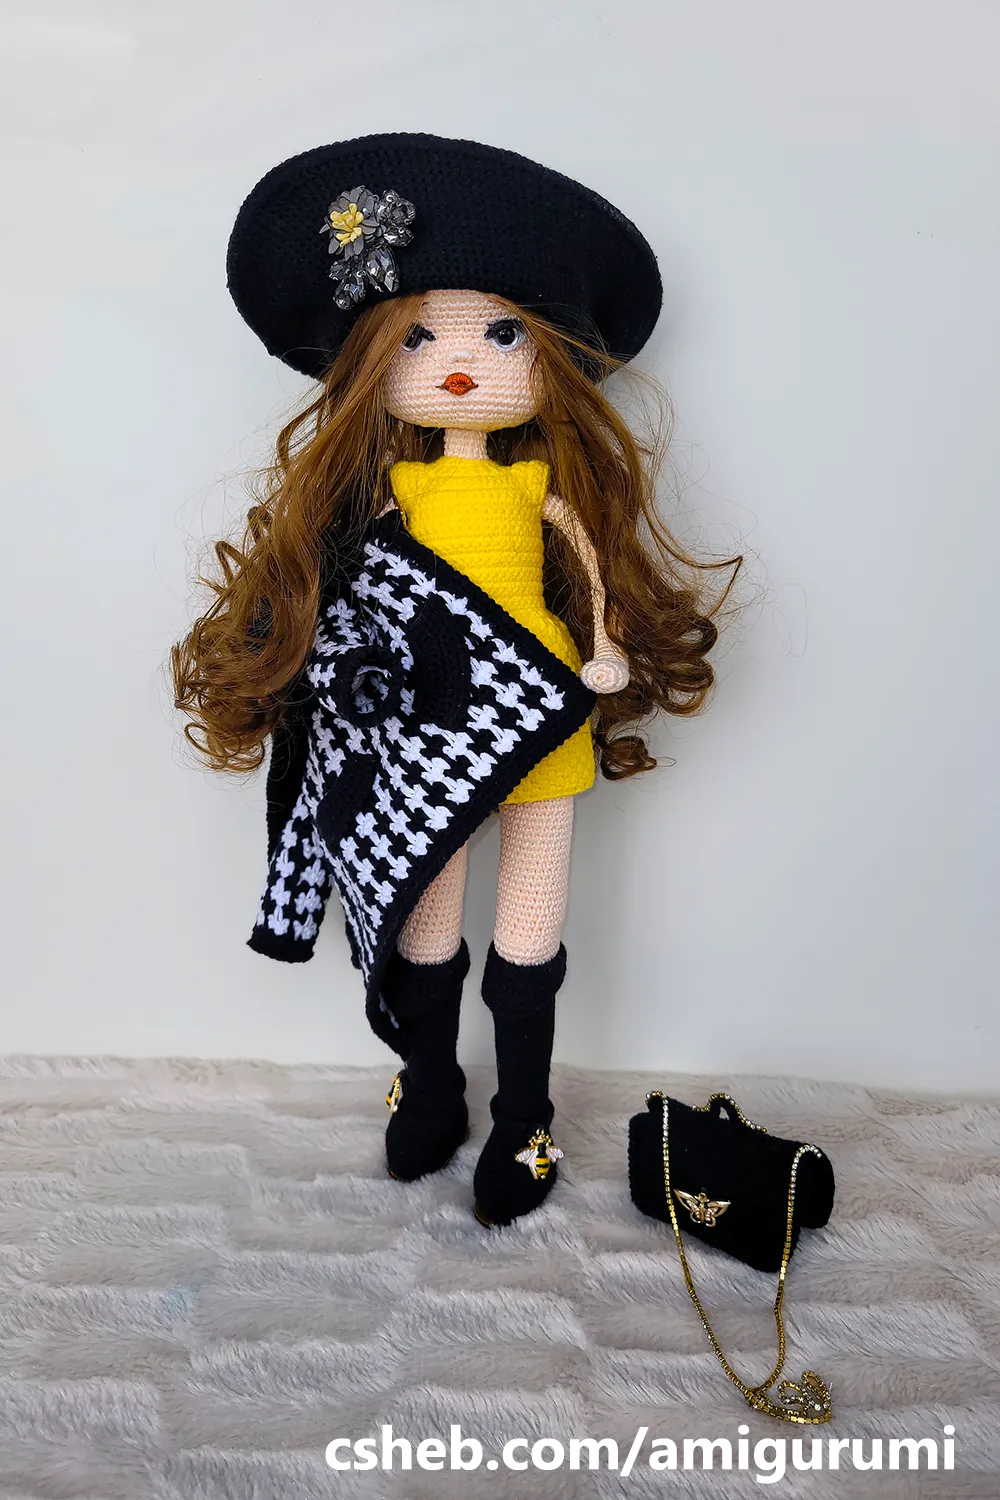
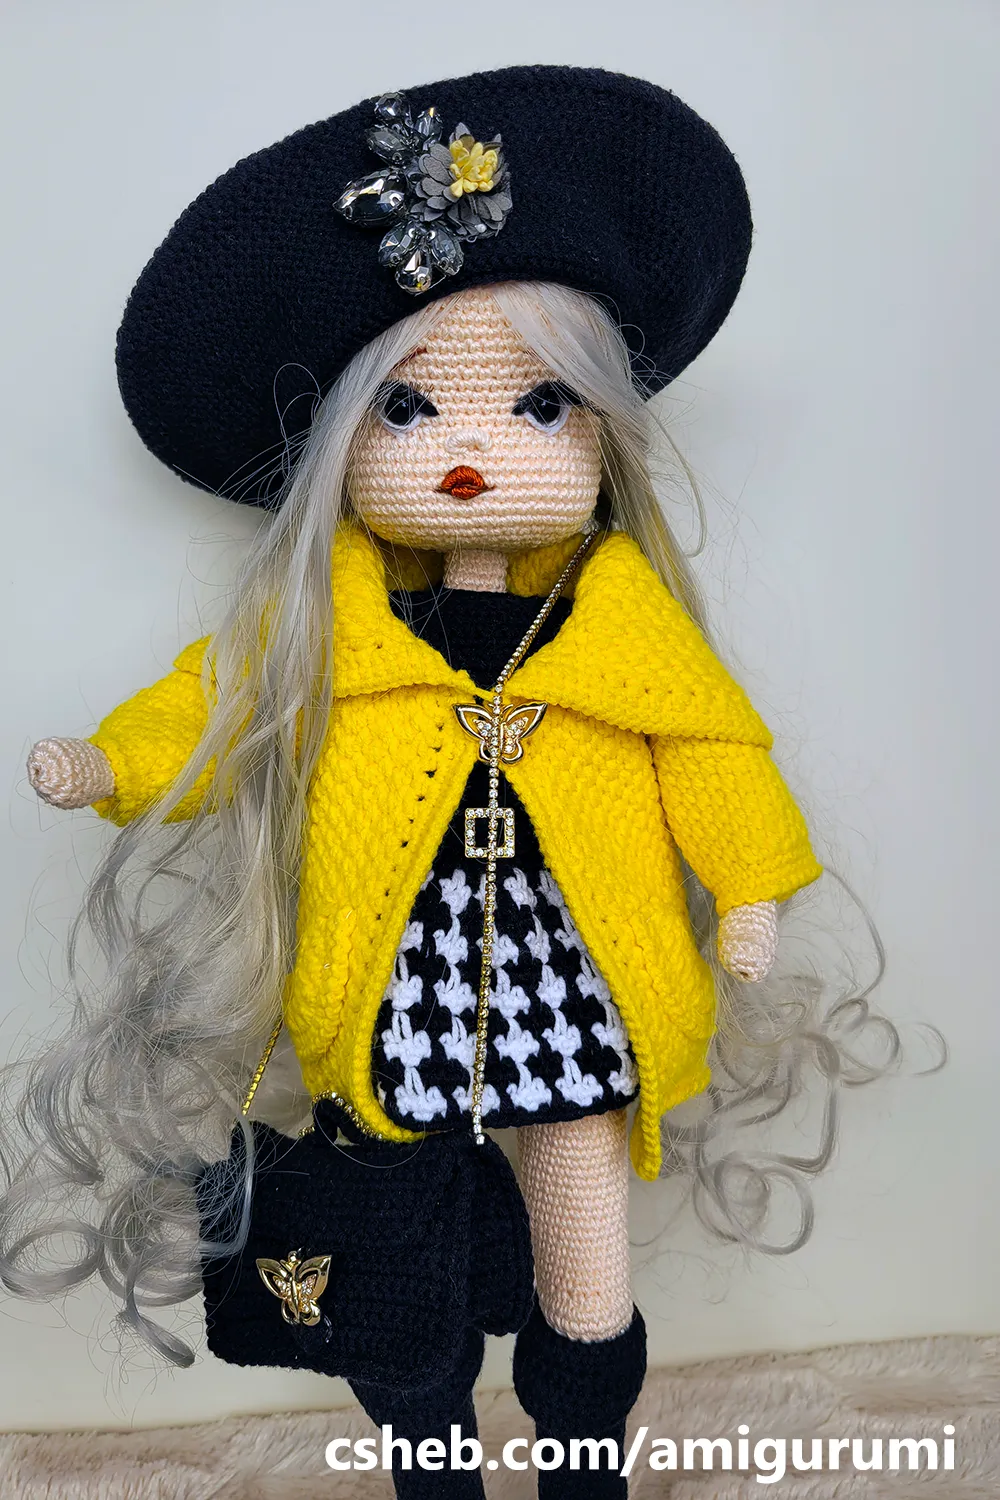
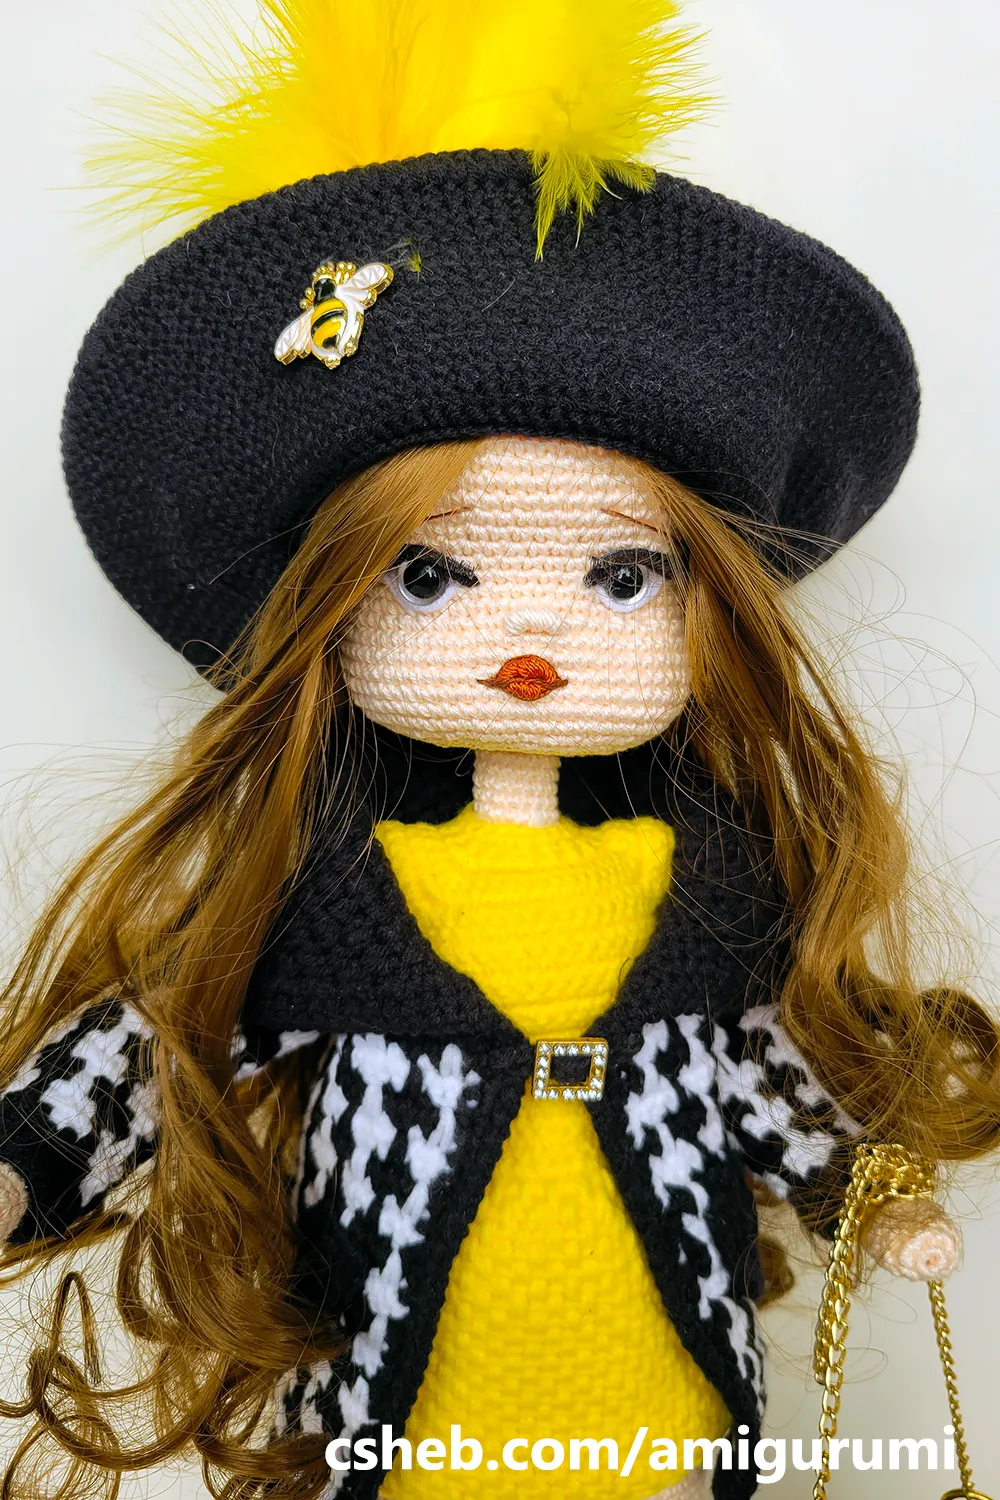
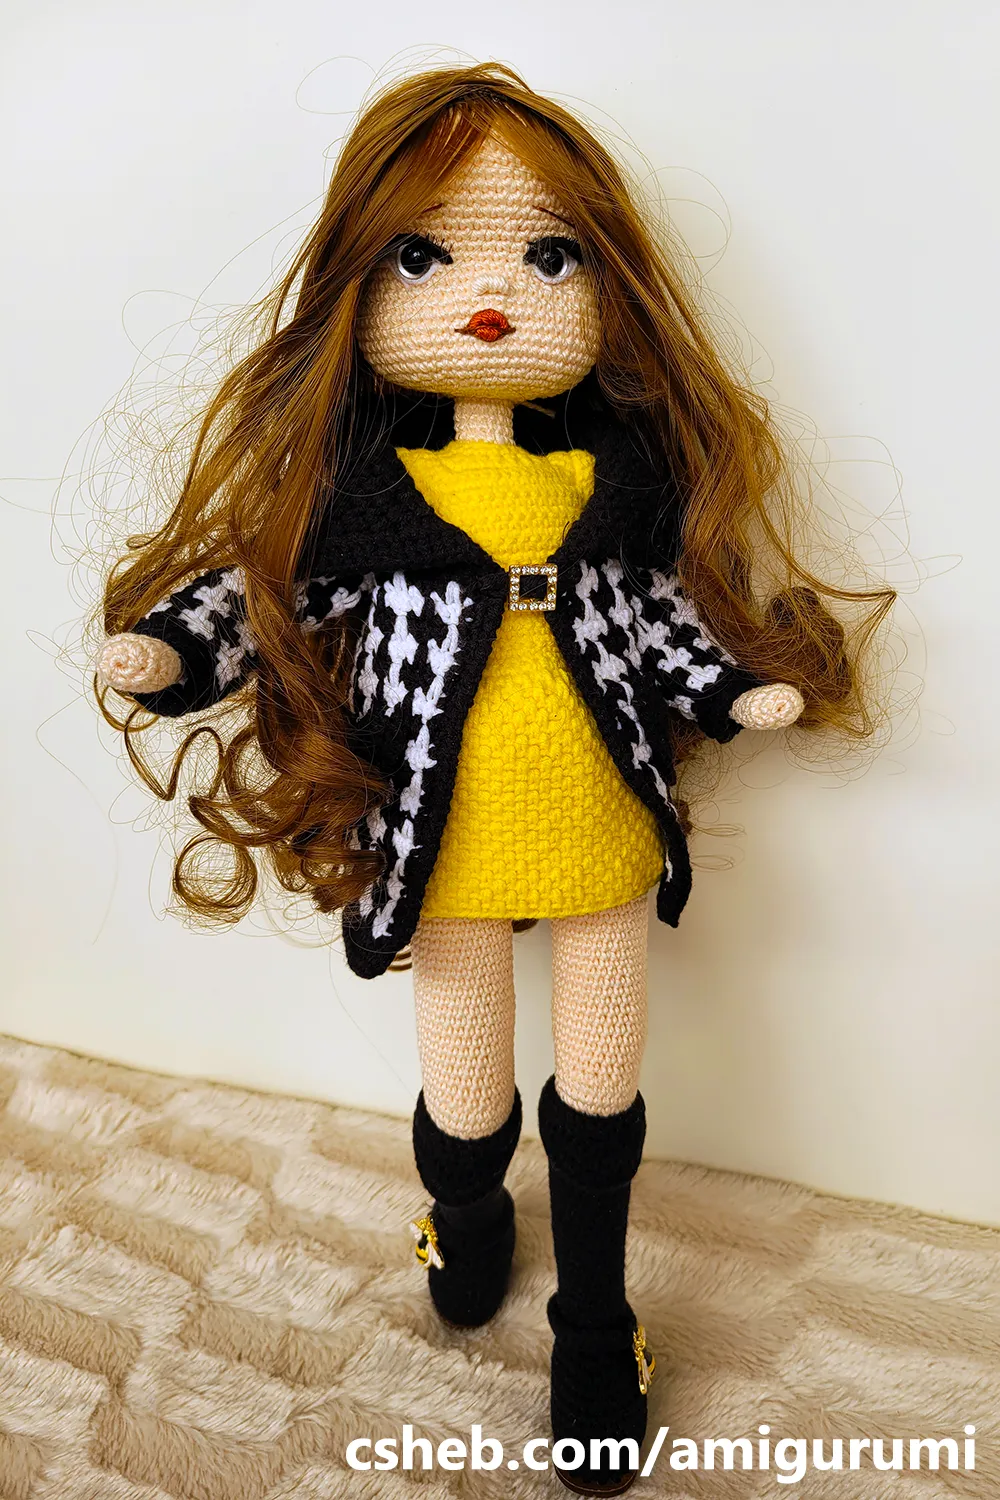
The dolls shown in the image stand out with their stylish details and unique accessories. To make an amigurumi doll with such intricate details, you’ll need to know the basic amigurumi techniques as well as how to add extra accessories and embellishments. Here are the basic steps for creating a doll like these fashionable ones:
1. Preparing the Materials
The first step is to gather high-quality materials to ensure a beautiful and durable result. Some of the materials used in crafting the dolls in the image are as follows:
- Yarn: The quality of the yarn directly affects the appearance of the doll. Thicker and more durable yarns help create a firmer, more defined shape.
- Stuffing Material: Cotton or silicone fiberfill is often used as stuffing. These materials help the doll maintain its shape and enhance durability.
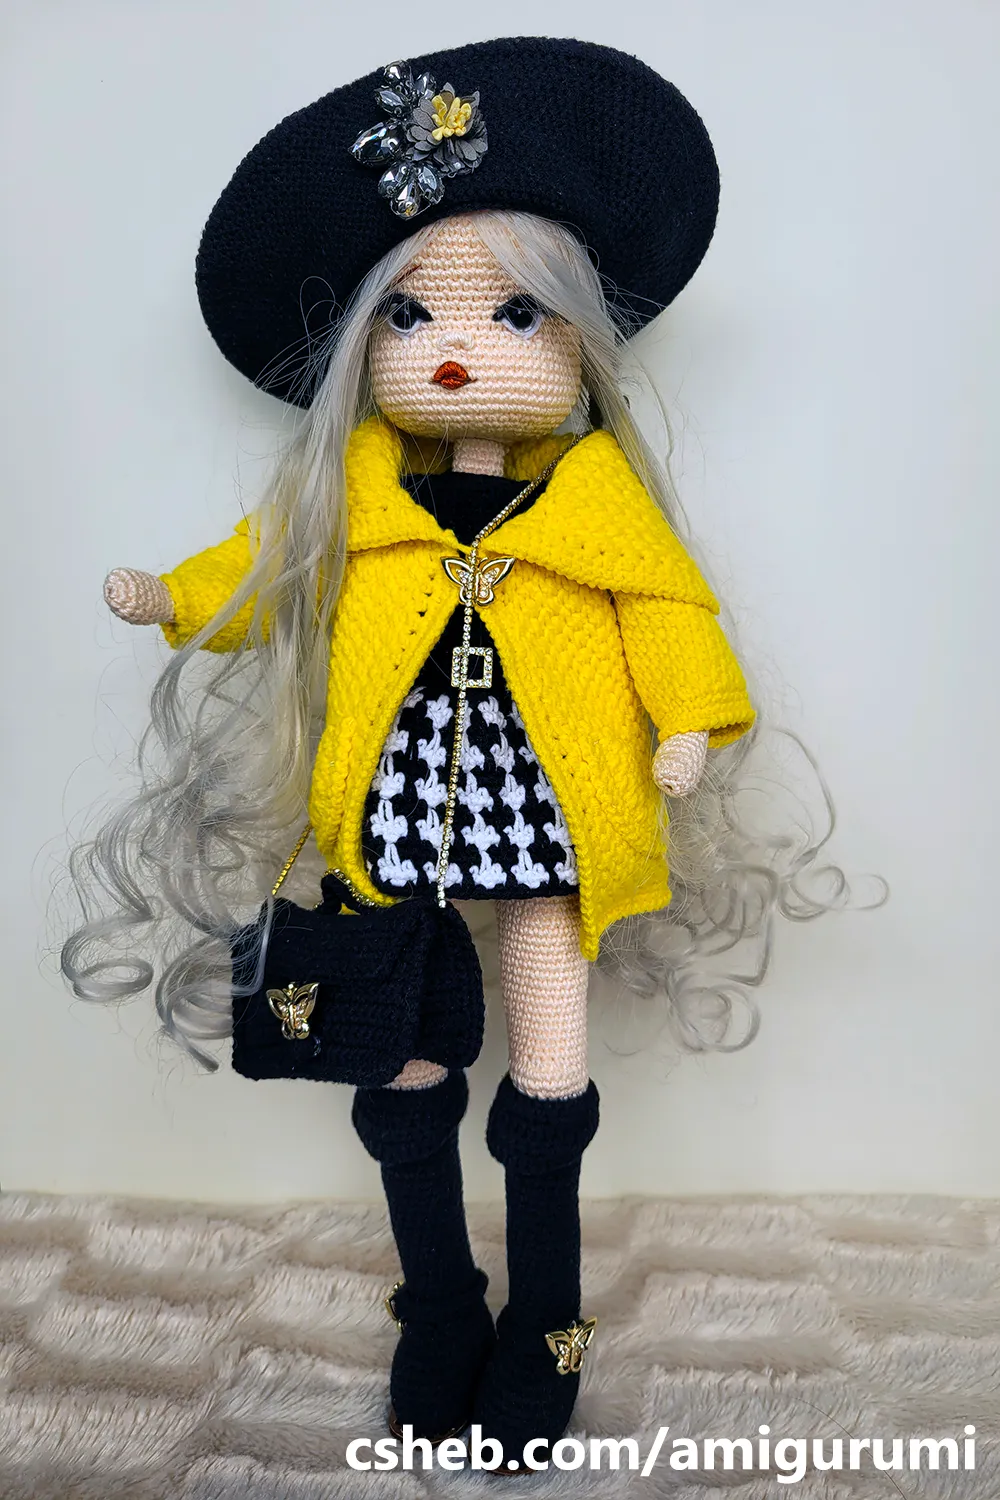
- Accessories: The dolls in the image are adorned with accessories like berets, yellow coats, bags, and shoes. For these accessories, you can use small decorative items such as beads, metal clasps, or buttons.
2. Creating the Body and Head
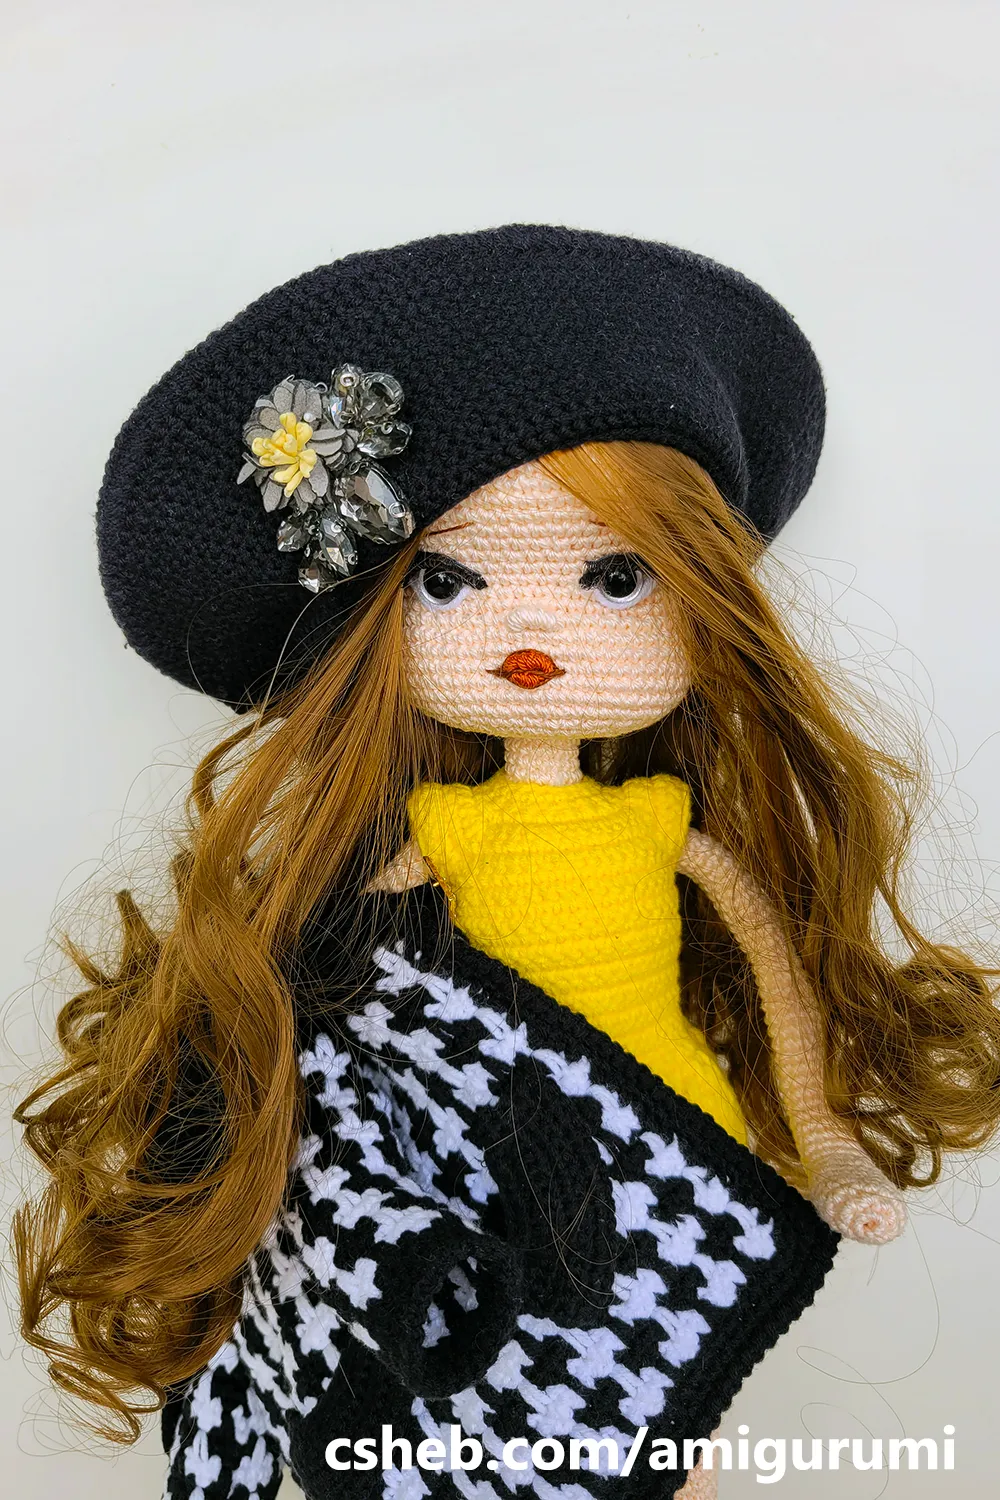
Amigurumi dolls are typically started by making the body. The head and body are made with the same thickness of yarn, and you can either make them as one piece or separate them. The dolls in the image feature larger eyes and expressive faces, which stand out against the body. You might prefer larger eye beads or safety eyes for a similar effect.


3. Adding Detailed Clothing and Accessories
The distinctive feature of these dolls is their detailed clothing and stylish accessories:
- Beret and Hat Details: The dolls wear black berets decorated with a yellow feather and small beads. These berets are crocheted separately and attached to the doll’s head. Additional small embellishments are added to the beret for a personalized touch. You can use different colors and decorations to create your own style.
- Clothing and Coats: The yellow coat on the dolls is an eye-catching detail. After crocheting the coat, you can add buttons or small buckles to the front. The black-and-white houndstooth-patterned skirts give the outfit a modern twist. Using thinner yarn for these clothes allows for a tighter, more delicate crochet texture.
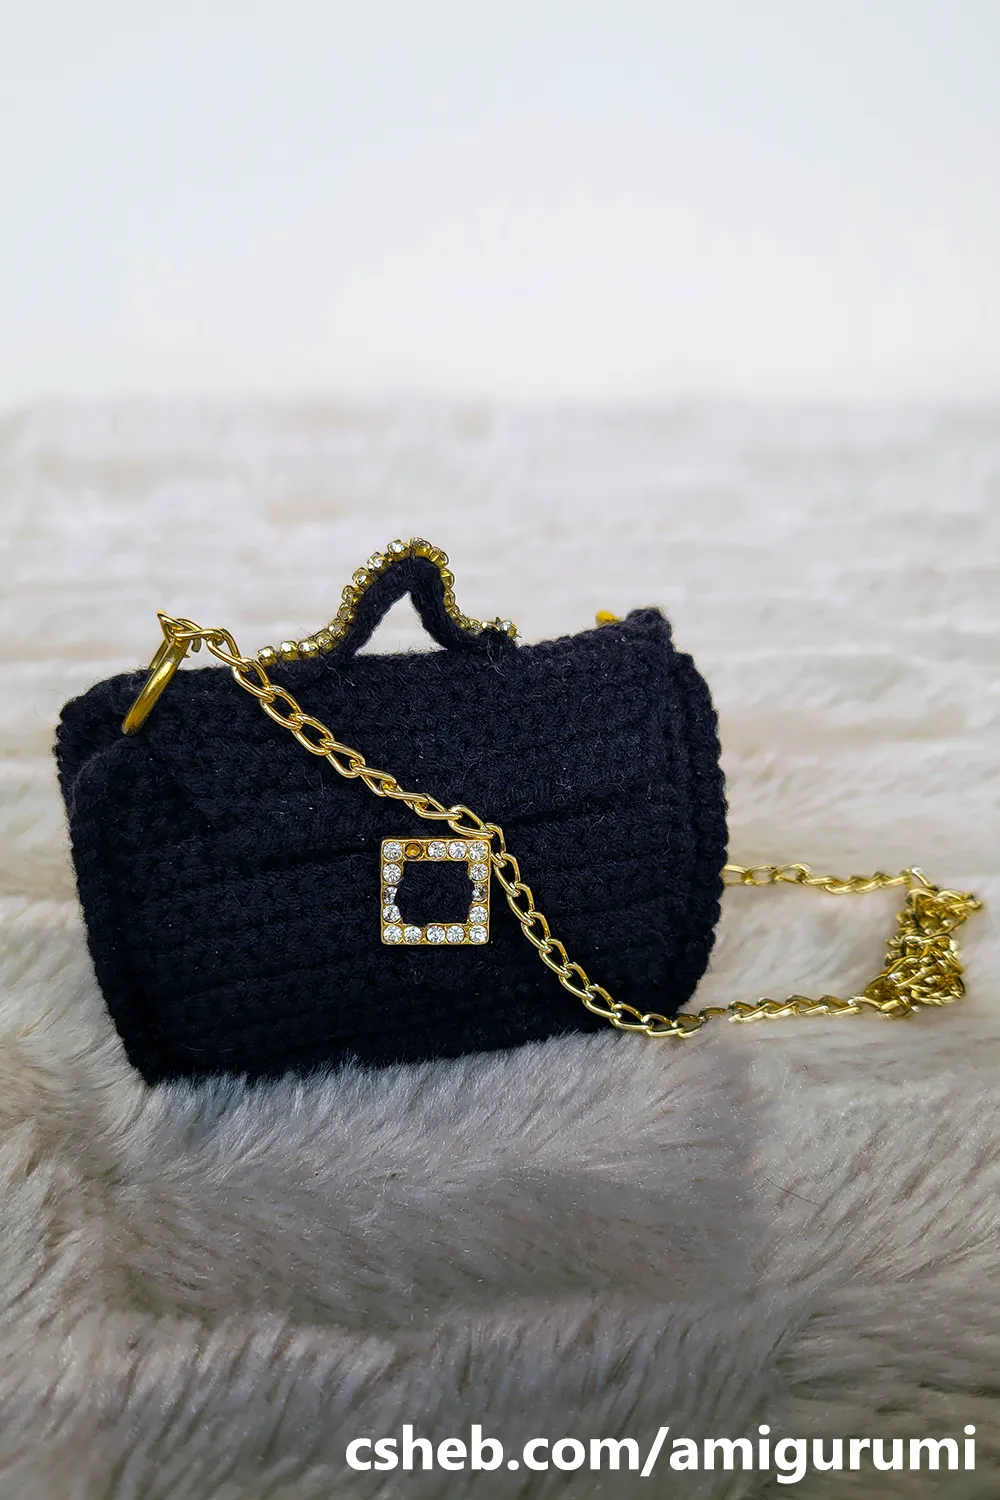
- Bag and Shoes: Each doll holds a stylish bag. To make the bag, crochet a small rectangular piece and join the edges. A metal butterfly-shaped accessory is added for decoration. The shoes are crocheted in black yarn and enhanced with small, intricate details.
4. Attaching the Doll’s Hair
The dolls in the image have voluminous, wavy hair. Amigurumi doll hair is often made using cotton yarn. To attach the hair, cut the yarn into long strands and sew or knot them onto the head. Then, style as desired. For wavy hair, you can slightly dampen the strands and curl them with rollers, or use a fine crochet hook to create twists.
5. Final Touches: Accessories and Embellishments
The final touches that make amigurumi dolls eye-catching are the accessories. Adding small bags, thigh-high socks, and bracelets, like on the dolls in the image, makes the doll more realistic. You can also use mini bee-shaped charms or metal embellishments to give your doll a unique look.
Tips for Making an Amigurumi Doll
- Be Patient: Amigurumi requires meticulous work and patience. Making a doll with lots of details can take time.
- Don’t Overdo the Accessories: Adding too many accessories can detract from the doll’s simplicity. Using coordinated colors and measured embellishments, as in the image, will result in a more stylish appearance.
- Use Quality Yarns: High-quality yarns make the doll more durable. Cotton yarns are often preferred as they offer both durability and an aesthetic look.
Conclusion
Amigurumi doll-making is an art form that allows you to use your creativity to achieve stunning results. Crafting a stylish, detail-rich doll like the ones in the image requires careful planning, quality materials, and patience. With the right approach, you can create a doll that reflects your personal style. Amigurumi dolls make excellent handmade gifts for children and can also serve as decorative pieces.
If you’re new to amigurumi, you can start with a simple doll and move on to more detailed models as you gain experience. Whether for a collection or as a gift, amigurumi dolls will always be cherished as a unique piece of handcraft.


